Hoow to Draw a Lion: Unleash Your Artistic Roar
The African lion is one of the most popular animals in the world and has been featured in countless works of art throughout history. This regal creature is not only powerful and majestic, but also one of the most difficult animals to draw. In this blog post, we will be taking a step-by-step approach to drawing a realistic lion.
Table of contents
- Key Takeaways:
- Understanding Lion Anatomy for Accurate Drawings
- Gathering Your Art Supplies
- Sketching the Basic Shape of the Lion
- Mastering the Lion’s Mane: Textures and Volume
- Bringing the Lion’s Face to Life
- Detailing the Facial Features: Eyes, Nose, and Mouth
- Creating a Dynamic Roar: Expressing Emotion in Your Lion Drawing
- Drawing the Lion’s Body and Tail with Precision
- Finishing Touches: Shading and Texturing for Realism
- Conclusion
We will begin by sketching out the basic shape of the lion’s head. Next, we will add in the details of the face, including the nose, eyes, and mouth. After that, we will work on the mane and the rest of the lion’s body. Finally, we will add in the background environment.

I hope you enjoy this blog post and that it helps you in your journey to becoming a better artist!
Welcome to this exciting art tutorial on how to draw a lion, where I will guide you through the process of sketching a majestic lion in pencil. This artist guide is perfect for beginner art enthusiasts as well as those who want to hone their drawing skills. So, grab your pencil and paper, and let’s embark on a journey to capture the essence of the king of beasts!
Key Takeaways:
- Get familiar with lion anatomy for accurate drawings
- Select the right art supplies for your desired style
- Sketch the basic shape and proportions of the lion
- Master the lion’s mane with textures and volume
- Bring the lion’s face to life with detailed facial features
- Express emotion through dynamic poses such as a lion’s roar
- Enhance realism in your drawing with shading and texturing techniques
Understanding Lion Anatomy for Accurate Drawings

In the world of wildlife art, the African lion is a popular and powerful subject. To create a detailed and realistic predator drawing, you must first study and understand the animal’s anatomy. From its muscular structure to its distinctive features, every aspect of the lion’s anatomy plays a vital role. In this section, I’ll guide you through this fascinating process and provide helpful insights for your drawings.
When it comes to the lion’s structure, it is crucial to break down the anatomy, making it easier to comprehend and apply to your art. Let’s look at some essential aspects of the lion’s anatomy that you should study:
- Muscular system: The muscular structure of the lion is integral to its predatory nature. Make sure you pay close attention to muscle definition, particularly around the shoulders, legs, and chest.
- Head and face: The lion’s head is composed of a wide, flat skull with powerful jaws. Understanding these proportions helps build an accurate foundation for the lion’s face.
- Mane: Exclusively found in adult male lions, the mane adds a regal and powerful appearance. Study its length, thickness, and variations in color to create a realistic and expressive mane in your drawings.
- Tail: The lion’s tail is an essential aspect of its anatomy. Keep its length and unique tufted tip in mind when sketching this part of the lion.
It’s also important to understand that the African lion is a wild animal, and spending time observing them in their natural habitat can provide valuable insights into their behaviors and posture. As you study and practice drawing these majestic creatures, remember to incorporate these observations for a more authentic and dynamic portrayal.
“In my drawings and paintings of lions, I focus on capturing their strength, spirit, and nobility. By paying close attention to their anatomy and behavior, my artwork brings the African wilderness to life.”
Now that we’ve discussed the importance of lion anatomy in your wildlife art studies, let’s explore some additional resources to help you master these magnificent creatures:
| Resource | Type | Description |
|---|---|---|
| Animal Anatomy for Artists | Book | A comprehensive guide to animal anatomy, including detailed illustrations, explanations of muscle structure, and tips on capturing their form in art. |
| Wildlife Art: Drawing Animals | Online Course | Learn various techniques for drawing animals, with a focus on accurate anatomy, wildlife behavior, and capturing your subject’s essence. |
| Wildlife Reference Photos | Website | An extensive collection of wildlife reference photos for artists, including close-ups, action shots, and various angles of African lions. |
In conclusion, understanding lion anatomy is a crucial aspect of creating accurate and detailed wildlife art. By studying the muscular system, head and face proportions, mane, and tail of the African lion, you’ll be better equipped to capture the essence of these predators in your drawings. With practice and dedication, you’ll soon be roaring with artistic confidence.
Gathering Your Art Supplies

To create a breathtaking and realistic lion drawing, selecting the right art supplies is crucial. This section will guide you through the process of choosing the best materials to bring your lion artwork to life, while also discussing the impact of different mediums on your final piece.
Choosing the Right Paper and Pencils
When it comes to choosing drawing paper, the texture and weight can significantly affect your lion sketch. For pencil art, opt for medium-weight paper with a slight texture, so your pencil sketch will grip onto the surface. In this beginner’s guide to drawing lions, graphite pencils are highly recommended for lion drawing, as they offer a wide range of values. However, charcoal pencils can also be used to create a darker and more dramatic lion’s mane.
The Role of Erasers and Blending Tools
Erasers and blending tools play a pivotal role in creating depth and realism in your lion drawing. They can help correct mistakes, soften lines, and blend shades to achieve seamless transitions. Blending stumps, for instance, are perfect for smoothing graphite pencil strokes, whereas kneaded erasers provide flexibility for erasing and highlighting areas in your artwork.
Incorporating Color: Charcoal, Ink, and Watercolor Options
Experimenting with various coloring mediums like charcoal, ink, and watercolor can add vibrancy and mood to your lion illustrations. Each medium offers unique possibilities for your artwork:
- Charcoal – Create a bold charcoal sketch of a lion’s mane, focusing on the contrast between dark and light areas, to provide intense visual depth.
- Ink drawing – For a striking look, develop an ink drawing of a majestic lion using fine lines and intricate shading techniques, highlighting the creature’s powerful features.
- Watercolor – Master watercolor techniques for lion art by layering washes of paint to depict the lion’s form while incorporating a full spectrum of colors to portray the warm tones of the savannah landscape.
In conclusion, securing the right art supplies will set the foundation for a fantastic lion drawing. Understanding the nuances of different mediums and their respective potential will broaden your artistic range and allow you to create stunning, true-to-life lion portraits.
Sketching the Basic Shape of the Lion

In this section, I will guide you through the initial steps of sketching a lion in pencil, starting with the drawing basics of establishing the overall shape and proportions. This foundational step is crucial for achieving accuracy and building up your art skills in lion drawings and beyond.
Before diving into the intricate details of a lion’s face or mane, it’s essential to first understand its basic shape and form. Begin by lightly drawing simple geometric shapes to create a rough outline of the lion’s head, body, and mane. Typically, this involves breaking down the lion into circles, ovals, and triangles.
Start with a circle for the head, and then add an oval for the muzzle. Next, sketch out triangles for the ears and add an even larger circle for the body. To create a sense of depth in your animal sketch, use perspective by overlapping the shapes and adjusting their size accordingly.
Quick tip: Keep your lines light and loose at this stage as you’ll be refining the sketch later. This will make it easier to erase and make adjustments.
Now that you have the basic shapes in place, it’s time to map out the proportions to ensure your drawing is well-balanced and accurate. These are the key elements to pay attention to:
- The size of the head in relation to the body
- The distance between the ears and eyes
- The placement of the muzzle, mouth, and nose
- The width and depth of the lion’s mane
- The length and thickness of the limbs
Use reference images to help you in this process, especially if you’re creating a lion’s roar in art, as the proportions may be slightly altered due to the intensity of the expression.
Remember, practice makes perfect. Don’t get discouraged if your initial sketches don’t turn out exactly as you had hoped. The more you practice, the better you’ll become at capturing the essence of a majestic lion.
Mastering the Lion’s Mane: Textures and Volume
The mane is a lion’s most recognizable feature. In this section, you will learn how to render it convincingly with attention to texture, volume, and the play of light and shadow, making it look as regal and powerful as it should be.
Drawing a Realistic Lion Mane
To achieve a realistic texture in a lion’s mane, consider specific pencil strokes and layering methods that mimic thick tufts of hair. Start by sketching the overall shape of the mane, paying attention to the direction the hair flows. After establishing the shape, add layers of shading using varied pencil pressure to create depth and texture.
- Short, quick strokes can mimic the short, coarse hair near the lion’s face.
- Longer, flowing strokes represent the longer strands of hair found in a lion’s mane further from the face.
- Varied pencil pressure gives the effect of fullness in the mane and provides a sense of thickness and dimension.
Adding Depth with Shading Techniques
Shading is essential for creating depth in a lion’s mane. This depth adds a three-dimensional appearance and brings out the details effectively. To achieve this, use pencil shading techniques for lions such as the following:
- Hatching: Using parallel lines, this shading technique adds value to the drawing, gradually making the mane darker as you add more lines.
- Cross-hatching: Similar to hatching, cross-hatching builds up more tone by adding intersecting lines to the hatching, creating a denser mane texture.
- Rendering: Using small, circular pencil strokes or scribbling, this technique helps you fill in the spaces between the hairs in the mane, providing a sense of fullness.
Creating Movement in the Mane
The illusion of movement makes a drawing come alive. To add movement to your lion’s mane, think of the lion in motion or a dynamic lion pose. Observe how the mane flows in the breeze or as the lion moves. Incorporate the following art techniques to create the illusion of movement:
- Curved lines: Curved lines in the mane design can create a sense of motion, making the drawing feel more dynamic.
- Directional strokes: Emphasize the direction of the hair with your pencil strokes to give the impression of the mane flowing with movement.
- Shading differences: Varying shades of darkness create visual contrast, adding depth and a sense of movement to the mane.
By mastering mane drawing, textures in art, and shading techniques, you will produce a stunning lion portrait capturing the African lion’s majestic essence. With practice, these drawing techniques will soon become second nature, enabling you to create lifelike lion art with ease.
Bringing the Lion’s Face to Life
In capturing the essence of a lion face drawing, the artist must pay close attention to the structure of the face while considering the influence of light and expression. The face is the focal point of any feline art and serves as a window to the majestic animal’s soul. Let’s explore several key aspects that will elevate your realistic lion portrait to a new level.
Firstly, begin by capturing the lion anatomy in art realistically. Study the facial structure, including the size and positioning of the eyes, mouth, and nose. Observe how the skull shape influences the lion’s facial features, and use these observations to guide your sketch. A firm grasp of anatomy ensures your drawing is both accurate and engaging.
“Perfection in art is the marriage of the artist’s imagination with a deep understanding of the subject’s essence.”
Light plays a crucial role in transforming your lion face drawing from a simple sketch to a powerful work of art. Use the knowledge of anatomy combined with an understanding of light and shadows to emphasize the facial structure, adding depth and dimension. Observe how light affects different parts of the face, such as the eyes, nose, and cheekbones. These observations can help you create a more dramatic and engaging lion portrait.
- Study the lion’s facial structure and anatomy.
- Use light and shadows to emphasize features and create depth.
- Consider the expression and emotion you want to convey through your drawing.
Finally, expression is what breathes life into your lion face drawing. Before starting your sketch, decide on the emotion you’d like to portray – a fierce roar, a serene gaze, or a tender moment between a lion and its cub. This decision will guide your hand as your pencil moves across the canvas. Capturing authentic and powerful emotions in your art can turn your drawing into a mesmerizing and captivating piece.
| Aspect | Importance |
|---|---|
| Anatomy | Understanding the facial structure ensures accuracy and realism in your drawing. |
| Light and Shadow | Adding depth and dimension to your sketch, giving it a sense of volume. |
| Expression | Infusing emotions into your drawing to make it more engaging and captivating. |
In summary, focus on mastering lion anatomy, using light and shadows, and capturing expressive emotions to make your lion face drawing truly come to life. By practicing these techniques, you can create a mesmerizing and realistic portrait of the king of beasts.
Detailing the Facial Features: Eyes, Nose, and Mouth
To create a truly stunning and lifelike lion portrait, it’s essential to pay close attention to the lion’s facial features, including its eyes, nose, and mouth. In this section, I will guide you through the process of drawing these intricate elements, helping you achieve a believable and expressive animal portrait.
Realistic Lion Eye Drawing Tutorial
Begin by understanding the shape and position of a lion’s eyes. Lions have almond-shaped eyes, with a slight tilt at the corners. They are typically placed at the midpoint of the lion’s head, slightly nearer the nose. To capture the essence of a lion’s gaze, focus on creating expressive lion eyes in your art through a detailed drawing process.
- Start by outlining the shape of the lion eye, including the upper and lower eyelids. Emphasize the curvature of the eyelids to convey a sense of depth.
- Draw the pupil towards the center of the eye, maintaining an oval shape.
- Add more details to the iris by sketching radial lines from the center to the edges. These lines will give the appearance of intricate patterns found in the lion’s iris.
- Define the areas of light and shadow within the eye, using lighter shades for the highlight and deepening the shade towards the edges of the iris. This variation in tone will produce a more realistic lion eye in your drawing.
- Use thin lines to represent the lion’s whiskers and fine fur textures around the eyes. These delicate details add depth and realism to your lion portrait.
- Apply shading techniques to create a sense of depth and dimension, considering the position of your light source. Subtle shading can be achieved by smoothly blending different shades of graphite or charcoal with a blending tool.
Tip: To make the lion’s eyes more expressive and lively, add a small highlight in the iris near the edge of the pupil. This small detail can significantly enhance the lifelike quality of your drawing.
Now let’s move on to capturing the lion’s nose and mouth:
- Sketch the nose shape, noting that the top part is wider and gradually narrows down. Add nostril details and small wrinkles around the nose to create depth in your drawing.
- Outline the lion’s mouth below the nose. Keep in mind that a lion’s mouth is broad and slightly curved. Consider incorporating details such as the lion’s roar sketch elements, if it’s relevant to your drawing subject.
- Create the texture of the lion’s fur surrounding the nose and mouth by using short, fine strokes with your drawing utensil. This will help you achieve detailed lion facial features in your artwork.
- Apply shading techniques to the nose and mouth areas, enhancing the depth and dimension of these features.
By accurately drawing and shading the lion’s eyes, nose, and mouth, you’ll create a lion portrait that encapsulates the majesty and soul of this beautiful animal. Practice and patience are key in achieving the desired level of realism and detail in your artwork.
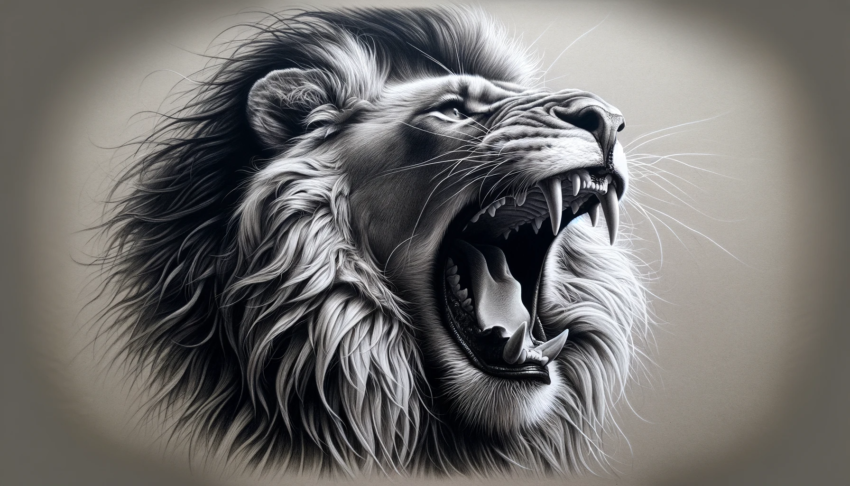
Creating a Dynamic Roar: Expressing Emotion in Your Lion Drawing
One of the most striking aspects of a lion is its powerful roar. Capturing this energy and raw emotion in your drawing can truly create a memorable piece. In this section, I will concentrate on how to bring the intensity and ferocity of a lion’s roar to life with an effective use of perspective, shape, and shading to depict emotion and power.
Tip: Study images and videos of roaring lions as references for your dynamic roar sketch. Observing the facial expressions, body posture, and intensity can help you accurately incorporate these elements into your drawing.
- Perspective: A well-chosen perspective can dramatically enhance a lion roaring scene. Find an angle that showcases the open mouth and exaggerated facial features effectively. A slightly lower angle looking up at the lion can emphasize its towering presence, while a close-up view can accentuate the dramatic tension.
- Shape: When sketching the roar, pay attention to the shapes created by the open mouth and its surrounding muscles. Don’t be afraid to exaggerate some aspects to intensify the impact of the roar. Furrowed brows, open nostrils, and wrinkles around the eyes and mouth add realism and expressiveness to your lion drawing.
- Shading: Shading plays a crucial role in conveying the depth and power of a lion’s roar. Utilize different shading techniques to define the contours of the face and muscles engaged in the roar. Pay special attention to areas that are hidden or partially obscured by shadows, such as inside the mouth and around the eyes.
“The emotions are sometimes so strong that I work without knowing it. The strokes come like speech.” – Vincent van Gogh
Remember, the roar of the lion is not only about the sound produced but also about the visible display of emotion and power. As artists, we strive to portray this emotional intensity in our drawings. Experiment with your artistic interpretation of a lion’s roar, finding your unique voice in conveying this powerful moment.
| Aspect | Tips |
|---|---|
| Perspective | Choose a dramatic angle that emphasizes the lion’s height and open mouth. |
| Shape | Focus on shapes created by facial features and muscles during the roar; exaggerate certain aspects for added impact. |
| Shading | Utilize shading techniques to create depth and intensity, paying special attention to shadows around the eyes and inside the mouth. |
In conclusion, expressing emotion in your lion drawing is an essential part of capturing the essence of a truly dynamic roar sketch. Keep experimenting, practicing, and refining your techniques to portray the breathtaking power and intensity of a lion’s roar with artistic flair.
Drawing the Lion’s Body and Tail with Precision
In this section, I will guide you through the process of creating a realistic lion anatomy drawing, focusing on the lion’s body sketch and lion tail. Mastering these elements will ensure that the proportions are maintained and that the lion’s posture conveys the desired attitude and grace.
First, let’s delve into the basics of a lion’s muscular structure in drawings. Understanding the physics of the lion’s body will enable you to create a lively and accurate sketch.
A successful lion drawing relies on attention to the muscle structure and how these elements connect to create the illusion of power and grace.
To achieve an accurate lion anatomy drawing, you need to consider the following aspects:
- The chest’s width and depth, which contribute to the lion’s powerful stance
- Smooth yet well-defined lines to illustrate the lion’s muscular shoulders and legs
- A comprehension of the spine’s curvature, essential for creating a realistic lion tail
- The posture of the lion, either at rest or in motion
Now that you have an understanding of the core components of a lion’s body sketch, let’s move on to specific techniques that will help you create a realistic lion muscle structure in your drawing.
Step-by-Step Guide to Drawing the Lion’s Body and Tail
- Study lion anatomy: It is vital to examine reference images of lions, focusing on their muscles, body shape, and posture. This will enhance your understanding and help you create a realistic lion’s body sketch.
- Begin with basic shapes: Start by outlining the lion’s body using basic shapes such as circles, rectangles, and ovals. You may also use a line to represent the lion’s spine, curving it gently to create the illusion of movement.
- Define key muscle groups: Based on the reference images, add lines to represent major muscle groups. For instance, sketch the shoulders, forelimbs, and hindquarters to capture the lion’s power and grace.
- Smooth the lines: Replace the basic shapes with smooth, continuous lines while maintaining the proportions and muscle definition. It is essential to blend the lines seamlessly to create a cohesive, visually pleasing drawing.
- Draw the lion tail: For a natural-looking lion tail, begin at the base, let it flow from the lion’s hindquarters, and gradually taper it as you approach the tip, where the iconic tuft of hair is located.
- Add shading and details: To enhance the realism of your lion anatomy drawing, integrate shading to represent the muscles and body contours. Observe how light and shadow interact with the lion’s muscles, and apply these principles to your drawing.
The following table illustrates the critical aspects to consider while drawing different parts of the lion’s body and tail.
| Body Part | Key Aspects |
|---|---|
| Chest | Width, depth, and connection to the front legs |
| Shoulders and Legs | Muscular definition, joints, and proportion to the body |
| Spine | Curvature, proportion, and alignment with the tail |
| Tail | Flowing from the hindquarters, tapered with a tuft of hair at the tip |
By following these steps and remaining cognizant of the key aspects of the lion’s body and tail, your lion anatomy drawing will capture the unique grace and power that sets apart the king of beasts. Remember, practice makes perfect, so continue to hone your skills and refine your technique, and soon you’ll be creating stunning lion drawings that capture the essence of this majestic creature.
Finishing Touches: Shading and Texturing for Realism
The finishing touches make a drawing feel complete. Here, I’ll share insights on fine-tuning the shading and adding final textures to the lion, ensuring that every part of the drawing contributes to the overall realism. The texture of the fur can define a lion drawing. In this tutorial, artists will learn various techniques to portray the thickness, direction, and texture of lion fur, enhancing the sensory experience of the viewer.
Techniques for Drawing Lion Fur
To create the appearance of realistic fur, mastering pencil art and shading techniques is crucial. Each type of fur differs in terms of thickness and direction. By practicing various pencil techniques for lion’s fur texture, your drawing will exhibit depth and realism. Some of the methods you can try include:
- Layering: Build layers of pencil strokes, gradually increasing pressure and density to create the illusion of thick, luxurious fur.
- Hatching and cross-hatching: Utilize parallel lines or intersecting lines to suggest texture and contour in your lion’s fur.
- Blending: Use a blending tool – such as a tortillon, paper stump, or tissue – to soften and blend pencil strokes, achieving a velvety appearance.
- Adding highlights: Enhance the texture by gently erasing areas where light strikes the fur, creating a contrast with the darker shadows.
Keep in mind, the direction and length of fur change with different parts of the lion’s body, so customize your techniques to match each area.
In the words of the famous wildlife artist, Robert Bateman, “The first and most important thing is to learn how to see…”. Observe real lions or photographs carefully, paying attention to the realistic texture that fur possesses.
| Area | Fur Length | Fur Directionality |
|---|---|---|
| Mane | Long | Outward from the face |
| Forehead | Short | Upward |
| Cheeks | Medium | Backwards |
| Body | Short | Backwards |
| Legs | Medium | Downwards |
By incorporating these techniques for drawing lion fur and focusing on the subtleties of shading and texturing, you can create a realistic lion drawing that brings the magnificence of these majestic creatures to life.
Conclusion
In this step-by-step lion art class, we embarked on an artist’s journey in wildlife illustration as we learned the nuances of creating a majestic lion. By following this comprehensive guide, whether your artwork finds its home on a canvas or drawing paper, you’ve been equipped with the skills and knowledge needed to capture the true essence of a lion on your canvas.
This summary of the lion drawing guide highlighted the importance of understanding lion anatomy, selecting appropriate art supplies, and mastering various techniques in drawing, shading, and texturing. From sketching the basic shape to mastering the lion’s mane and capturing their facial features, we covered a complete range of aspects essential for creating an accurate and compelling portrayal of a lion.
It is important to remember that the key to mastering the art of drawing lions is patience and practice. As you continue refining your skills and experimenting with different techniques, you will undoubtedly see progress in your capabilities. So, keep honing your creative prowess and immerse yourself in the exhilarating world of wildlife artistry.
FAQ
What are the best pencils and tools for drawing lions?
The best pencils for drawing lions are a variety of graphite and charcoal pencils, allowing you to create different levels of detail, shading, and texture. Tools such as erasers and blending stumps are also essential for refining your drawing and adding realism to your lion’s portrait.
How can I achieve a realistic fur texture in my lion drawing?
To create a realistic fur texture, try working with different pencil techniques, varying pressure and direction. Pay attention to details such as the thickness, direction, and overall appearance of the lion’s fur, layering strokes to achieve a greater sense of depth and texture in your drawing.
How important is understanding lion anatomy for accurate drawings?
Familiarizing yourself with lion anatomy is crucial for accurate and convincing drawings. By studying the lion’s form and muscle structure, you can more effectively depict its physical nuances, which is essential for creating realistic wildlife art.
How can I convey movement and emotion in my lion drawing?
Conveying movement and emotion in your lion drawing can be achieved through careful attention to perspective, shape, and shading. For example, capturing the intensity and ferocity of a lion’s roar requires effectively portraying the lion’s facial expression and body language, as well as the play of light and shadow.
Are watercolor and ink suitable mediums for lion drawings?
Yes, watercolor and ink are suitable mediums for lion drawings, allowing you to add color, mood, and vibrancy to your artwork. Experiment with different techniques to find the medium that best complements your drawing style and captures the essence of the majestic lion.
How do I draw a lion’s face with realistic facial features?
To draw a realistic lion face, pay close attention to the structure of the face and its intricate details, such as the eyes, nose, and mouth. Break down each feature into simple forms and shapes, using shading and blending techniques to capture the depth, character, and expression of the lion’s face.