
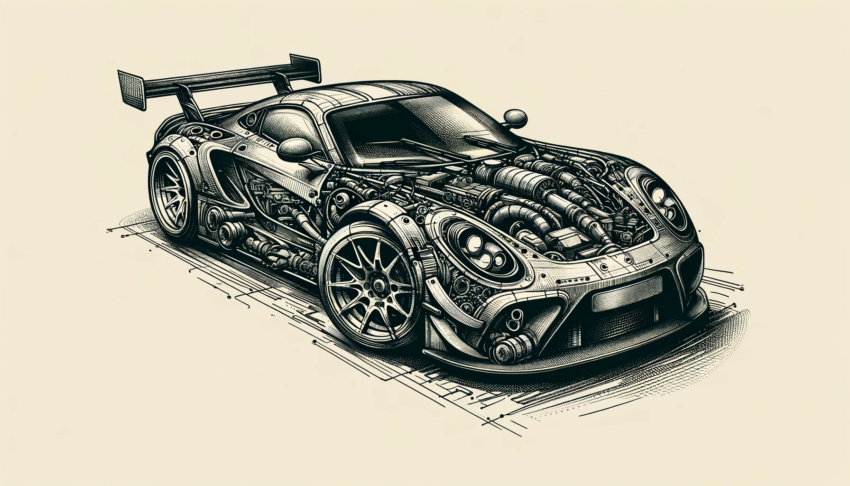
Welcome to the ultimate guide on how to draw a car, designed to take you from beginner to expert in a thrilling step-by-step car drawing journey. Whether you’re completely new to the world of car illustration or you’re looking to refine your skills, this easy car drawing tutorial will provide a solid foundation for your creative growth. Together, we’ll tackle car drawing for beginners and beyond, turning your passion for automobiles into a powerful artistic skill. Let’s dive in and learn car drawing from start to finish!
Table of contents
- Key Takeaways:
- Unlock Your Artistic Potential with Basic Drawing Techniques
- Gather Your Art Supplies: Essentials for a Car Illustrator
- Diving Into Car Sketching: A Step-by-Step Approach
- Refining Your Car Drawing: Detailing Techniques
- Elevate Your Car Sketches: The Secrets of Composition Principles
- From Sketch to Masterpiece: Adding the Final Touches
- Adapting Your Skills: Digital Drawing and Automotive Illustration
- Practice Makes Perfect: Tips and Exercises for Continuous Improvement
- The Creative Process and Joining the Artist Community
- Conclusion
Key Takeaways:
- Understanding essential drawing techniques and car anatomy for more dynamic and realistic illustrations
- Gathering the right art supplies for successful car drawing
- Implementing a step-by-step approach to building and refining your car sketches
- Enhancing your drawings with detailing techniques and understanding the importance of composition principles
- Adapting your skills to digital drawing and automotive illustration
- Practicing and improving through exercises and joining the artist community
- Embracing the creative process and the joy of continuous artistic growth
Unlock Your Artistic Potential with Basic Drawing Techniques
Every great car drawing begins with mastering the essential drawing techniques. We’ll start by exploring the different pencil grades and the variety of strokes each can produce, setting the foundation for your car sketches. Then, as we delve deeper into car anatomy and perspective drawing, you’ll gain the skills to add dynamics and realism to your artwork. Understanding these basics will unlock your artistic potential and elevate your car illustrations beyond mere drawings to captivating art.
Grasping the Fundamentals of Pencil Grades and Strokes
Knowing your tools is quintessential in any artistic endeavor. I’ll introduce you to the various pencil grades—ranging from soft to hard—and how to strategically use them to achieve different levels of shading and texture in your car drawings. We’ll go through exercises on line quality and stroke variety to give you a feel for the full range these tools provide.
| Pencil Grade | Characteristics | Use in Car Drawings |
|---|---|---|
| 2H, H | Hard, lighter lines | Initial sketches, light shading |
| HB | Medium hardness/darkness | General sketching, defining lines and shapes |
| B, 2B | Softer, darker lines | Shading, adding depth and texture |
Understanding Car Anatomy for More Dynamic Drawings
Having a solid grasp of car anatomy is key to creating dynamic drawings that breathe life into your artwork. I’ll guide you through identifying and sketching the underlying structure of cars, from the chassis to the bodywork. By understanding the forms and functions of different car components, you’ll be better equipped to capture the essence of various car models and types.
“To draw a car realistically, you must first understand its anatomy. Study the lines, shapes, and proportions that define a car’s character.”
The Role of Perspective in Sketching Realistic Cars
Perspective is what gives a drawing its depth and dimension, making it look lifelike. In this section, I’ll show you how to implement perspective drawing techniques to elevate your car sketches from flat illustrations to realistic renderings. Through understanding vanishing points and the horizon line, you’ll create car drawings that truly pop off the page.
- Choose a single or two-point perspective for your drawing.
- Determine the placement of your vanishing points.
- Draw a horizon line to establish the viewer’s eye level.
- Sketch guidelines converging towards the vanishing points.
- Begin adding car details and structures following the guidelines.
With a strong foundation in drawing techniques, pencil grades, car anatomy, and perspective, you’re well on your way to creating dynamic, realistic car sketches. Continue refining your skills with practice and exploration, and soon your car drawings will stand out as captivating works of art.
Gather Your Art Supplies: Essentials for a Car Illustrator
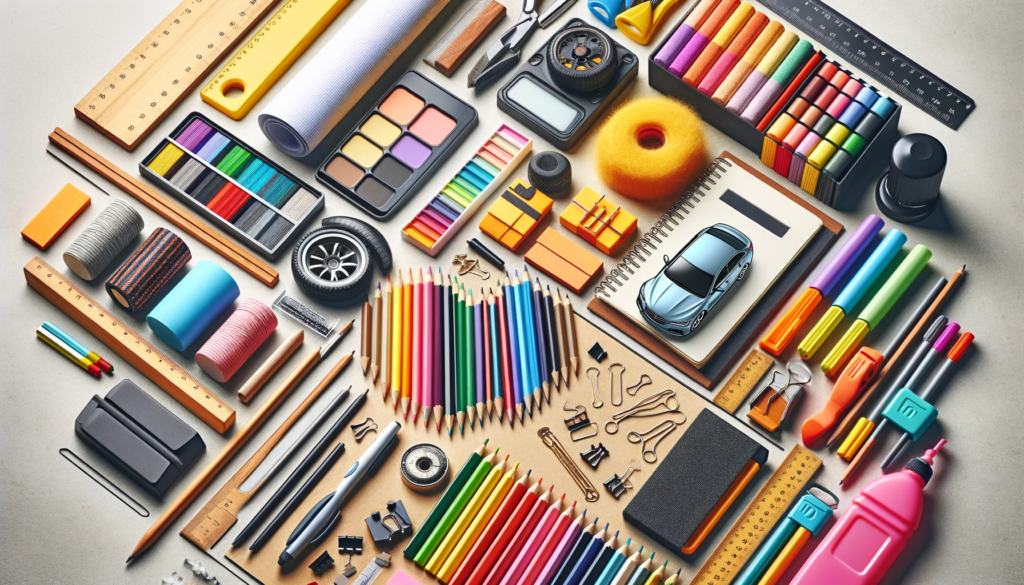
To embark on your car drawing journey, you’ll need the right art supplies. Having the appropriate materials at your disposal will streamline your process and set you up for success from the very start. In this car illustration guide, I’ve compiled a list of essential tools for any car illustrator, including recommendations on paper types, best pencils for different effects, erasers, rulers, and more:
- Drawing paper
- Graphite pencils (Different grades)
- Charcoal pencils
- Colored pencils
- Erasers (Kneaded and vinyl)
- Sharpeners
- Fine liners
- Rulers and protractors
- Blending tools (Tortillons and blending stumps)
When selecting paper for your car illustrations, it’s important to consider the texture, weight, and finish that best suits your preferred drawing method. Smooth paper is excellent for detailed pencil work, while textured paper works well for charcoal drawings.
| Paper Type | Texture | Best For |
|---|---|---|
| Bristol Paper | Smooth and Medium | Pencil, Ink, Charcoal |
| Drawing Paper | Smooth and Medium | Pencil, Charcoal, Ink, Colored Pencil |
| Charcoal Paper | Textured | Charcoal, Pastel, Chalk |
| Watercolor Paper | Textured | Watercolor, Ink, Acrylic |
Understanding the nuances of drafting tools is equally important. Graphite pencils come in multiple grades, allowing for a range of effects. For example, a 4B pencil will produce soft, dark lines, while a 2H pencil will yield light, fine lines.
Remember: Practice makes perfect. Experiment with various art supplies to discover which work best for your unique style and technique.
In conclusion, having the appropriate art supplies is crucial for any aspiring car illustrator. By investing in the right materials and becoming familiar with their properties, you can ensure a solid foundation for your creative process. Now, gather your tools and prepare to embark on your car drawing journey!
Diving Into Car Sketching: A Step-by-Step Approach

Now that we’ve covered the basics, it’s time to dive into the actual process of car sketching. I’ll walk you through a step-by-step approach, starting with the initial sketches and moving through to more defined lines. This structured method will help you build your car drawings gradually, ensuring each element is in proportion and your final piece is polished and professional.
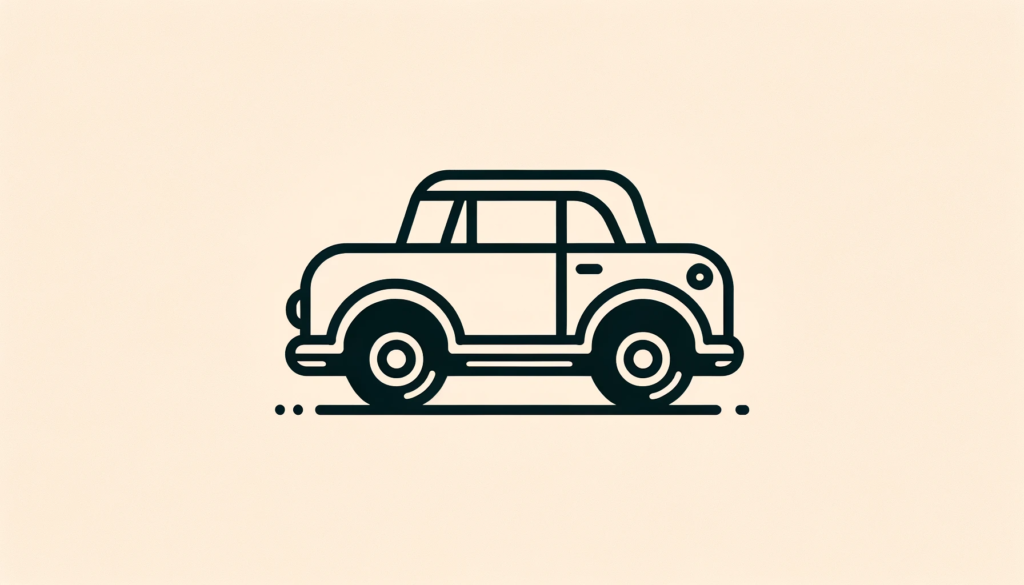
Starting with Simple Shapes for Car Proportions
Beginning with simple geometric shapes is a tried-and-true method for nailing car proportions right from the start. In this section, I’ll teach you how to break down complex car designs into basic shapes, creating a solid framework for your drawing. You’ll learn to see cars in terms of rectangles, cylinders, and more, making the process of sketching any car model vastly more approachable.
Step 1: Draw a rectangle
- Sketch a rectangle as the main building block for your car drawing. This will represent the overall length and width of the vehicle, setting the foundation for your proportional sketch.
- Keep in mind the specific model you are sketching, as different car types have varying proportions.
Step 2: Add wheels
- Outline two circles on either end of the rectangle to represent the wheels.
- Be mindful of the distance between the wheels, as this is an essential aspect of a car’s proportions.
Step 3: Sketch basic car components
- Add geometric shapes for the roof, hood, and trunk, ensuring they’re proportionate to the rectangle base.
- When sketching each component, remember that different car models have unique shapes and angles.
Once you’ve completed these steps, you’ll have a foundational sketch on which to build the finer details of your car drawing. The key to mastering car sketching lies in breaking down complex designs into these basic shapes, allowing even the most intricate models to become approachable and manageable.
With these foundational shapes in place, let’s review some common proportions and vehicle dynamics to enhance your sketches.
| Car Type | Rectangle Proportion | Wheel Distance | Rooftop and Windshield Angle |
|---|---|---|---|
| Sedan | Long and narrow | Medium | Gentle slope |
| Sports Car | Short and wide | Wide | Low, aggressive angle |
| SUV | Long and wide | Medium | Steeper slope |
As you progress through your car sketching journey, continue practicing these basic techniques and experimenting with different car models. The more you sketch, the easier it will become to recognize simple shapes within complex designs and create proportionate car drawings that showcase vehicle dynamics.
Refining Your Car Drawing: Detailing Techniques
With the basic sketch in place, it’s time to refine your drawing and add the details that will bring it to life. We’ll explore various car drawing techniques to enhance your car sketches, such as adding shadows and highlights, defining textures, and capturing the intricacies of car design features. This is where your car starts to emerge from the paper, showcasing all its unique elements and characteristics.
Enhancing Realism through Shadow, Light, and Texture
Realism in car drawings is achieved by understanding how light interacts with form and texture. I’m excited to show you methods for adding shadows and highlights, which will create depth and volume in your drawings. You’ll also learn how to accurately render different textures found in car components, such as the smoothness of the bodywork or the roughness of tires.
A practical approach to understanding shadows and highlights includes:
- Observing real cars and studying how light affects their appearance.
- Experimenting with different sources and angles of light in your drawings.
- Practicing rendering shadows and highlights in various intensities and on different materials.
Texture is another critical aspect of achieving realism in car art. Here are some tips to help you render textures effectively:
- Use different pencil grades and strokes to achieve the desired effect.
- Study the texture of real car components and practice mimicking them in your drawings.
- Pay attention to the interaction between texture, light, and shadow.
Capturing the Intricacies of Car Design Skills
The devil is in the details, and nowhere is this truer than in car drawings. This section will focus on how to capture the intricate details that define a car’s character, from the sleek lines of the body to the patterns on the grill. With these advanced car design skills, you’ll turn a basic car sketch into a piece of art that stands out for its attention to detail and accuracy.
| Car Feature | Detailing Technique |
|---|---|
| Body Lines | Use subtle variations in line weight to suggest the contours of the car’s body. |
| Grill Patterns | Observe different grill designs and practice replicating their patterns with precision. |
| Wheel Rims | Focus on recreating the intricate shapes and patterns found in various rim styles. |
| Emblems and Badges | Study the detail and craftsmanship of different car brands’ emblems, and practice drawing them accurately. |
| Headlights and Taillights | Pay attention to the unique design elements of each car’s lights, and render them using contrasting shades and textures. |
Mastering these detailing techniques will elevate your automotive illustration skills and allow you to create accurate and captivating car art. Remember, practice makes perfect – dedicate time to honing your skills, and you’ll soon see stunning results in your drawings!
Elevate Your Car Sketches: The Secrets of Composition Principles

In art, composition is paramount, and car sketches are no exception. By understanding the secrets of composition principles, you can position your car within the frame for maximum impact, creating car drawings that are not only accurate but also aesthetically pleasing and engaging for the viewer. Let’s uncover these essential principles to elevate your car drawings.
Balance: It refers to the equal distribution of visual weight within your artwork. You can achieve balance by harmonizing elements like shape, size, and color, resulting in a drawing that feels stable and attention-worthy.
Alignment: It concerns the arrangement of lines and forms in a piece. By ensuring your lines and shapes are perfectly aligned, you’ll be better positioned to create dynamic and professional-looking drawings.
Focal Points: They are the areas in an artwork that draw the viewer’s attention. In a car drawing, key focal points might be the headlights, wheels, or the car’s unique design features.
“Understanding composition principles enables you to craft engaging and visually pleasing car sketches that captivate the viewer’s attention.”
Now, let’s take a look at some car drawing tips and tricks that leverage these principles for an enhanced creative process:
- Start with a rough thumbnail sketch to find the best composition for your drawing. Experiment with different perspectives, angles, and proportions until you find the most appealing layout.
- Create a sense of depth by using overlapping shapes. For example, having the rear wheel behind the front wheel can add a feeling of three-dimensionality to your car drawing.
- Experiment with value and contrast. Light and dark values can be used to emphasize focal points and create a sense of depth in your car sketch.
- Don’t forget about the background. Sometimes a simple or minimalistic background can help to enhance the appearance of your car drawing.
| Composition Principle | Description | Car Drawing Application |
|---|---|---|
| Balance | Equal distribution of visual weight | Harmonize elements like shape, size, and color to achieve stability |
| Alignment | Arrangement of lines and forms in an artwork | Ensure lines and shapes are perfectly aligned for a dynamic drawing |
| Focal Points | Areas that draw viewer’s attention | Emphasize key features such as headlights and wheels |
By incorporating these composition principles and car drawing tips into your creative process, you’ll be well on your way to producing impressive and visually appealing car sketches. Remember, practice makes perfect, so don’t be afraid to experiment and refine your technique as you continue to push your artistic boundaries.
From Sketch to Masterpiece: Adding the Final Touches
The journey from an initial sketch to a finished masterpiece involves adding those critical final touches. Here, you’ll learn how to refine your edges, perfect your shading, and ensure every detail aligns harmoniously to create a cohesive and compelling piece. These final adjustments are what will separate your work from the crowd and truly showcase your skill as a car illustrator.
Emphasizing Symmetry and Balance for an Authentic Look
Symmetry and balance are the hallmarks of a polished car drawing, giving it an authentic and professional appearance. We’ll practice techniques to check and refine the symmetry of your car sketches and learn how to balance different elements within your composition. These final checks are crucial for achieving a realistic car drawing that accurately represents the sleek design of real-world cars.
“Symmetry is what we see at a glance; based on the fact that there is no reason for any difference…” – Blaise Pascal
To demonstrate the importance of symmetry and balance in car illustrations, let’s examine a step-by-step visualization exercise that you can use to improve your drawing skills:
- Start by carefully studying the car model you’re drawing. Pay attention to any symmetrical features on both sides of the vehicle.
- As you sketch, periodically compare both sides of your drawing, ensuring that corresponding details align and mirror each other accurately.
- Utilize a ruler or gridlines to check the consistency of the distances and angles between various elements of the car drawing.
- Be mindful of the balance between different elements within the composition, such as dark and light areas or complex and simple aspects of the car.
- Finally, make any necessary corrections to ensure your car illustration achieves optimal symmetry and balance.
| Car Drawing Element | Symmetry Check | Balance Check |
|---|---|---|
| Wheels | Ensure equal size and proper alignment | */% |
| Windows | Maintain consistent shape and size | Ensure proper distribution of tint vs. clear areas |
| Body Lines | Confirm equal angles and passing through similar points | */% |
| Headlights and Taillights | Compare and correct the shape, size, and position | */% |
| Shadows and Highlights | */% | Ensure balanced distribution according to the light source |
In conclusion, polishing your car illustration with the final touches of symmetry and balance will elevate your art to the next level. By being mindful of these essential aspects and practicing visualization techniques, you’ll develop a keen eye for detail that will set your car drawings apart from the rest.
Adapting Your Skills: Digital Drawing and Automotive Illustration
With the fundamentals of car drawing under your belt, let’s explore how to adapt these skills to the digital realm. In this section, I’ll guide you through the basics of digital drawing and automotive illustration, covering the tools and software that can enhance your work and open up new possibilities. Whether you aim to create digital renderings for professional use or just want to experiment, this section will set you on the right path.
Digital drawing offers many advantages over traditional methods, such as the ability to easily edit your work, experiment with different styles, and utilize a wider range of tools and features. Let’s take a look at some popular software options and essential tools for digital automotive illustration:
| Software | Features | Price Range |
|---|---|---|
| Adobe Photoshop | Industry-standard software, raster-based, supports a wide range of brushes and tools | Subscription-based, from $9.99/month |
| Corel Painter | Offers natural media simulation, extensive brush library, and customization options | Starting at $429 per perpetual license |
| Clip Studio Paint | Combines raster-based and vector-based functions, built-in tools for perspective drawing | $49.99 for the basic version, $219 for the advanced version |
| Procreate | iPad-exclusive software, user-friendly interface, powerful brush engine | $9.99 one-time purchase |
When choosing a digital drawing tool, consider your specific needs and goals. Keep in mind the need for compatibility with your hardware, your budget, and the quality of educational resources available for the software. To kick-start your digital automotive illustration journey, consider the following steps:
- Choose the right software: Invest time in researching and selecting the software that best suits your needs and style.
- Learn the basics: Familiarize yourself with the interface, brushes, and tools of the program. Many software providers offer built-in tutorials or provide online educational resources to help you get started.
- Practice sketching: Utilize digital drawing techniques to practice your car sketching skills, implementing the principles and methods acquired from your previous traditional drawing experience.
- Experiment with different styles: Digital tools provide endless possibilities to explore various artistic styles. Don’t be afraid to branch out and try new things.
- Join online communities: Connect with fellow artists and enthusiasts to gain inspiration, advice, and critiques of your work.
As you evolve in your digital automotive illustration journey, remember that practice and persistence are key to success. The more time you invest in mastering the software and refining your skills, the more impressive and polished your digital car drawings will become.
“There is no substitute for hard work. Always be humble and hungry.” – Dwayne “The Rock” Johnson
So, are you ready to embrace the world of digital automotive illustration? The road to mastery may not be easy, but the endless possibilities, freedom, and creative power that come with digital drawing are well worth the effort. Happy drawing!
Practice Makes Perfect: Tips and Exercises for Continuous Improvement
Building a skill takes practice, and car drawing is no different. In this section, I’ll share some tips and practice techniques along with car drawing exercises that will help you hone your technique and achieve continuous improvement. From daily drawing challenges to studying different car types, these strategies will keep you motivated and focused on your artistic growth.
“The expert in anything was once a beginner.” – Helen Hayes
1. Daily Drawing Challenges
Daily drawing challenges serve as excellent practice techniques to keep your artistic momentum alive. Committing to spending some time every day to sketch cars will eventually result in improved skills and confidence in your ability to tackle complex car designs. Additionally, daily practice helps you retain the techniques you have learned, making them second nature.
2. Studying Different Car Types
Expand your artistic horizons by studying and sketching various car types, such as sedans, hatchbacks, SUVs, and sports cars. Familiarizing yourself with a wide range of automotive designs will not only improve your observational skills but strengthen your ability to adapt your techniques based on the unique characteristics of each car type.
- Classic Cars: Study and practice drawing vintage cars to learn about their unique design elements and proportions.
- Modern Cars: Focus on contemporary designs, which tend to have organic, flowing curves and sharp lines characteristic of the latest trends and technologies.
- Concept Cars: Unleash your creativity by exploring futuristic car concepts, which often experiment with new forms, materials, and tech features.
| Car Type | Key Design Characteristics |
|---|---|
| Sedans | Four-door body style, closed roof, and separate trunk compartment. |
| Hatchbacks | Compact size, a sloping rear roofline, and a rear liftgate that opens to access the cargo area. |
| SUVs | Larger size, taller ride height, and spacious interiors, often with off-road capabilities. |
| Sports Cars | Low-slung, aerodynamic design, with emphasis on speed and performance. |
3. Analyzing Automotive Artwork
Analyzing artwork created by other artists can help you gain insight into their techniques, styles, and approaches. When you look at their car drawings, pay attention to the way they handle proportion, perspective, shading, and other essential elements. Learn from their work to continually refine and expand your own car drawing skill set.
4. Seeking Constructive Feedback
Asking for feedback from experienced artists, car enthusiasts, or other people with an understanding of car drawing or automotive design is invaluable in identifying areas that need improvement. Embrace the input and use it as an opportunity to learn and evolve your skills.
Remember, the journey to becoming a proficient car illustrator requires dedication, practice, and patience. Utilize these strategies, and you’ll be well on your way to continuously improving your skills and creations.
The Creative Process and Joining the Artist Community
The creative process is a deeply personal and infinitely rewarding journey. Each artist develops their unique approach to creating memorable and distinctive artwork over time. In this section, we will explore essential elements of the creative process in relation to car drawing and how joining an artist community can offer you support, constructive feedback, and opportunities to share your passion for car drawing with others who appreciate this art form.
“Creativity is allowing yourself to make mistakes. Art is knowing which ones to keep.” – Scott Adams
Developing a creative routine tailored to your individual needs and preferences is crucial in staying motivated and fostering continuous growth in your car drawing skills. To get started, you might consider setting aside dedicated time for practice, seeking out car drawing for kids resources to spark inspiration, or experimenting with various materials and techniques.
One way of nurturing your creativity is by paying close attention to the world around you. Observing different car models and styles, or simply taking inspiration from nature and architecture, can greatly enhance your car drawings and ignite new ideas.
Additionally, joining an artist community can provide invaluable support and encouragement in your artistic journey. Engaging with other artists passionate about car drawing, whether through online forums or local workshops and classes, is an excellent way to exchange knowledge, techniques, and experiences.
- Share your work and receive constructive feedback from fellow artists.
- Participate in collaborative projects and challenges to expand your skills.
- Exchange reference materials, techniques, and inspiration with like-minded individuals.
To help you get started in finding the right community for you, check out the table below, outlining various platforms and resources that cater to car drawing and the wider artist community:
| Platform/Resource | Description |
|---|---|
| ArtStation | A digital art community where artists can showcase their work, network with professionals, and participate in challenges and contests. |
| DeviantArt | One of the largest online art communities globally, offering an extensive array of resources and support for artists of varying styles and levels of expertise. |
| CGSociety | A community dedicated to the advancement of computer graphics in various industries, including automotive design and visualization. |
| Local workshops and classes | Search for art classes or workshops in your area offering car drawing instruction and the opportunity to connect with local artists. |
Embrace the creative process and immerse yourself in the world of car drawing by developing your personalized routine, staying inspired, and connecting with fellow artists who share your passion. This continuous journey of exploration and growth will reward you with a life-long love for the art of car drawing, and a community of supportive and enthusiastic peers.
Conclusion
Drawing a car is a journey that can lead to incredible artistic growth and satisfaction. As we conclude this step-by-step car drawing guide, I encourage you to take what you’ve learned and continue to explore, practice, and develop your unique style. Remember, every artist was once a beginner, and with perseverance and passion, your car illustrations can become true masterpieces.
Easy car drawing for kids and car sketching tips shared in this tutorial are meant to serve as a foundation on which you can build upon. Keep sketching, keep learning, and most importantly, enjoy every step of the creative journey. With the right attitude and dedication, you can master the art of car drawing and inspire others with your exceptional skills.
As you progress in your artistic endeavors, consider sharing your work and joining a community of fellow artists who appreciate the beauty of car drawings. This experience can provide valuable support, constructive feedback, and endless inspiration. So grab your pencils, papers, and digital tools, and embark on a journey that will transform your creative abilities.
FAQ
What pencil grades should I use for car drawings?
A range of pencil grades is recommended for car drawings, from hard (H) pencils for light lines and details to soft (B) pencils for shading and creating darker values. Familiarize yourself with different pencil grades to achieve various effects in your artwork.
How can I improve my car drawing skills?
To improve your car drawing skills, practice regularly and focus on mastering fundamental techniques like perspective drawing, understanding car anatomy, and using the right art supplies. Engage with the artist community for feedback, support, and inspiration, and continuously challenge yourself with new exercises and projects to refine your skills.
How do I create depth and realism in my car drawings?
Creating depth and realism in your car drawings can be achieved through the use of perspective, shadows, highlights, and texture rendering. Understand and apply principles of light and shadow to add volume to your drawings, and practice rendering various textures found in car components to enhance realism.
Where can I find a good step-by-step car drawing tutorial?
There are numerous online resources and books available, offering step-by-step tutorials on how to draw cars. Look for a comprehensive guide that covers essential drawing techniques, car anatomy, composition, detailing, and various car types. These resources can help you develop your skills and become proficient at drawing cars.
Can I apply my car drawing skills to digital art?
Yes, you can apply your car drawing skills to digital art. Familiarize yourself with digital drawing tools and software programs, such as Adobe Illustrator, Photoshop, or Procreate, to create digital automotive illustrations. Start by practicing with basic shapes and techniques to adapt your traditional drawing skills into a digital format.