I invite you to embark on a journey into the captivating world of hummingbird art, where you’ll learn valuable techniques and insights to create your own stunning hummingbird drawings. With dedication and practice, you can develop a closer observation of nature, skilfully using basic shapes, proportions, and angles to create accurate and realistic representations of these enchanting creatures. This guide will provide you with essential knowledge and tools to excel in drawing hummingbirds, making your art come alive.
Develop a closer observation of nature through consistent practice and studying high-resolution photographs.
Focus on basic shapes, proportions, and angles before adding intricate details to your hummingbird drawing.
Understand bird anatomy and feather growth patterns to enhance realism in your art.
Master the skills to capture motion, shading techniques, and texture details for a lifelike portrayal of hummingbirds.
Explore various mediums to expand your hummingbird art repertoire and achieve unique expressions of creativity.
The Intriguing World of Hummingbirds: Understanding Your Subject
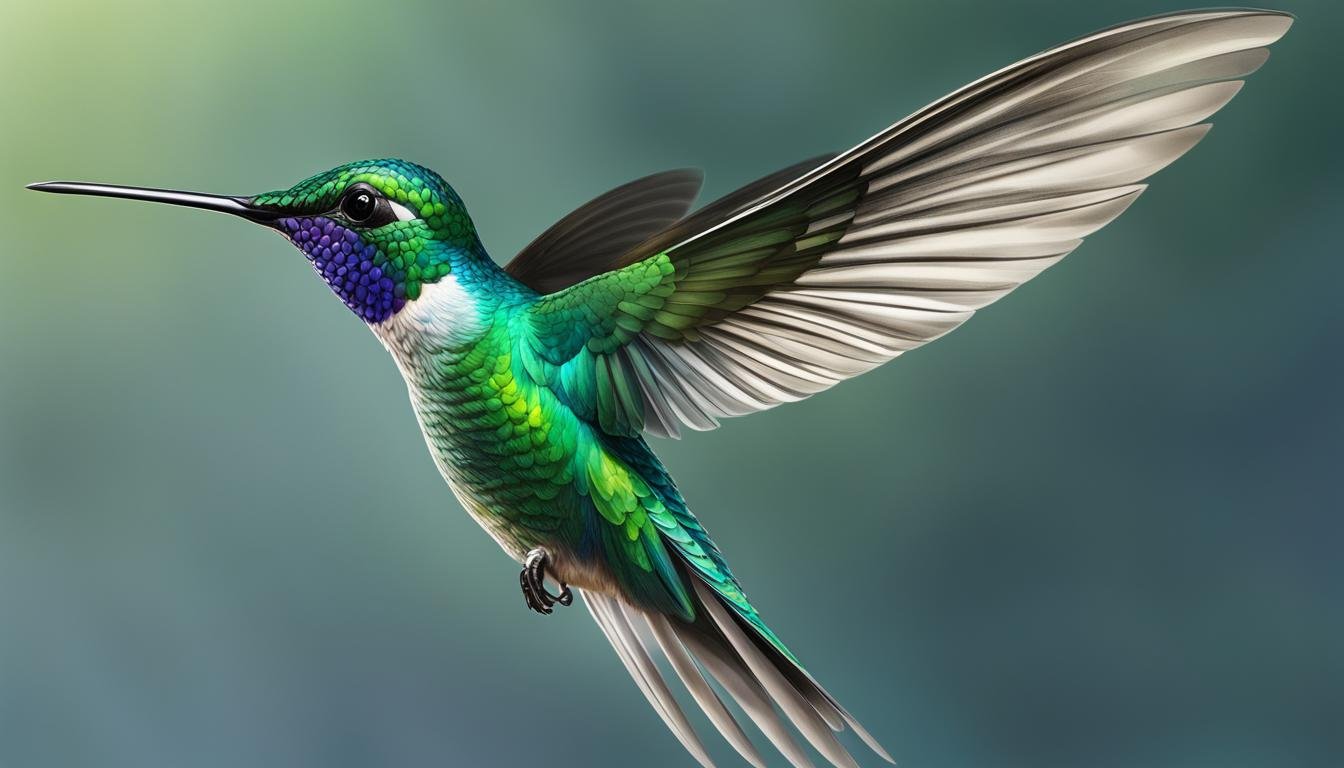
Hummingbirds, known for their vibrant presence in the avifauna family, play a vital role as pollinators and exhibit a diversity of 363 species. With this course, I will gain insights into the biology and anatomy of these enchanting birds. The program includes step-by-step drawing demonstrations, allowing me to understand and sketch various species, ranging from the North American Rufous Hummingbird to the Cuban Bee Hummingbird of the Caribbean. Throughout my art journey, both bird anatomy and the dynamics of feather groups will be important facets to study.
“The poetry of earth is never dead.” – John Keats
As I begin to explore the intriguing world of hummingbirds, let’s first take a look at some facts about these fascinating creatures:
Hummingbirds are among the smallest birds on Earth, with some species measuring only 3 inches in length.
They can beat their wings up to 80 times per second, generating the humming sound from which their name is derived.
Hummingbirds are capable of hovering in one spot, as well as flying backward and upside-down.
They have a high metabolism and consume more than their body weight in nectar each day.
Hummingbirds play a crucial role in the ecosystem, pollinating flowers as they feed on nectar.
The more I learn about these birds, the more captivated I become. Not only do they have a unique beauty, but they also possess extraordinary abilities that are fascinating to study. In the following table, I’ve compiled a comparison of some notable hummingbird species:
Species
Size
Habitat
Distinct Features
Rufous Hummingbird
3.5 – 4 inches
Nest in North America, migrates to Mexico
Rusty orange coloring, aggressive behavior
Anna’s Hummingbird
3.9 – 4.3 inches
West coast of North America, from Alaska to Baja California
Green and gray with red crown and throat
Ruby-throated Hummingbird
2.8 – 3.5 inches
Eastern North America and Central America
Green back with iridescent red throat, white belly
Cuban Bee Hummingbird
2.2 inches
Cuba and Isla de la Juventud
Bright blue on males, white underparts with green upperparts on females
Having a deeper understanding of these bird species can serve as valuable inspiration for my art. By appreciating hummingbirds’ diversity, I can focus on capturing their essence and unique features when drawing them.
Setting the Scene: Choosing the Right Materials for Hummingbird Drawing
Embarking on a hummingbird sketch calls for appropriate materials to create a stunning representation of the vivid bird. In this section, we will look at essential equipment, paper selection, and pencil and eraser options, ensuring the best results for your artwork.
Essential Sketching Equipment
When starting a hummingbird sketch, consider using a graphite pencil or a Col-Erase non-photo blue pencil to lightly outline the bird’s primary form. This light outlining allows you to make necessary adjustments before advancing to the details.
Understanding Paper Textures and Weights
Selecting the appropriate paper texture and weight can significantly affect your hummingbird drawing’s final appearance. Different textures provide unique surfaces for the pencil, brush, or other media to interact with. Below is a brief overview of common paper types suitable for hummingbird drawing:
Paper Type
Texture
Weight
Best Use
Cold Press Watercolor Paper
Medium Texture
Heavy
Works well for watercolors and mixed media
Hot Press Watercolor Paper
Smooth
Heavy
Excellent for detailed watercolors and dry media
Heavyweight Drawing Paper
Smooth to Slightly Textured
Heavy
Great for dry media and detailed work
Sketching Paper
Smooth to Slightly Textured
Lighter
Ideal for pencil sketches and rough drafts
Selecting Your Pencils and Erasers
Choosing the right pencils and erasers contributes to the final quality of your hummingbird sketch. Various types of pencils can determine the level of attainable detail. Meanwhile, the proper eraser selection allows for easy modification and refinement. Consider the following pencil and eraser options:
Graphite Pencils: Come in different hardness levels, suitable for a range of drawing techniques.
Colored Pencils: Offer a wide variety of colors and allow for detailed shading and highlights.
Mechanical Pencils: Maintain a consistent line width and never require sharpening.
White Plastic Erasers: General purpose erasers, suitable for graphite and colored pencil.
Kneaded Erasers: Moldable erasers that can be shaped for precision erasing, perfect for subtle changes and creating highlights.
With the right materials, achieving a lifelike and captivating hummingbird drawing is within reach. So gather your pencils, paper, and sketching equipment, and embark on your artistic journey towards drawing the perfect hummingbird.
Constructing the Foundation: Basic Shapes and Proportions of Hummingbirds
When beginning a hummingbird drawing, it is essential to correctly capture the basic shapes and proportions. These fundamental components set the stage for a more accurate and detailed illustration. In this section, you will learn how to establish an accurate silhouette using simple lines and shapes, as well as the importance of reassessing proportions during the early stages of the drawing process.
First, start with a simple line to indicate the bird’s posture. This line will help you visualize the overall flow and movement of the hummingbird. Next, draw an oval shape for the body and a circle for the head. These basic shapes help create the bird’s silhouette, making it easier to visualize the final drawing.
Once the basic shapes are in place, take the time to reassess proportions, particularly the relative size of the head to the body. This step, though it may seem trivial, is crucial for ensuring that your drawing retains accurate spatial relationships. To further enhance the accuracy of your drawing, consider using a reference photo of a hummingbird to assist with getting the proportions as precise as possible.
Remember, it’s better to invest time in perfecting the basic shapes and proportions at the beginning of your drawing process than struggling to correct them later on.
As you progress with your drawing, it’s essential to periodically reevaluate proportions and make adjustments as necessary. This approach allows you to create a strong foundation for the additional details that will bring your hummingbird to life.
Start with a simple line for the bird’s posture
Draw an oval for the body and a circle for the head
Reassess and adjust proportions as needed
Reference a high-quality photograph for additional guidance
In summary, the key to constructing a strong foundation for your hummingbird drawing lies in mastering basic shapes, accurately representing proportions, and continually evaluating your work throughout the process. By following these steps and remaining mindful of your hummingbird’s basic silhouette, you’re well on your way to creating a beautiful and lifelike illustration.
From Skeleton to Feathers: Study Bird Anatomy for Improved Accuracy
A profound understanding of bird anatomy can significantly enhance the accuracy of a hummingbird drawing. Knowledge of where feathers are positioned on the bird’s body and how they grow reveals the natural patterns and shapes that define the species’ silhouette. Recognizing these feather groups is essential for realistic portrayal and creates a more lifelike drawing.
Recognizing Feather Groups and Their Patterns
Hummingbirds have several feather groups, including their flight feathers, contour feathers, and down feathers. Each group has a specific function and appearance. Studying the structural arrangement of these feathers on the bird’s body will help you identify the flow and patterns that characterize each species.
Flight feathers are the large feathers on the wings and tail, responsible for providing lift and maneuvering during flight.
Contour feathers are the feathers that cover the body, giving the bird its shape and coloration, and providing insulation and protection from the environment.
Down feathers are the soft, fluffy feathers that are hidden beneath the contour feathers and insulate the bird from cold temperatures.
Knowing the function and appearance of each feather group helps artists to recreate the patterns and shapes accurately, leading to more realistic drawings of hummingbirds.
Learning the Significance of Hummingbird Postures
Birds, hummingbirds included, have the astonishing ability to shift their shape by controlling their feather groups, puffing up in the cold or smoothing down when warm. Observing various hummingbird postures is paramount for capturing the essence of the bird’s movement and mood. This visual understanding enables artists to sketch hummingbirds with a higher degree of realism and accurate depiction of their dynamic forms.
“The way a bird holds its feathers and moves can reveal much about its attitude, emotions, and intentions. Paying close attention to these subtle cues will help you better understand and represent the life and nature of hummingbirds in your drawings.” – Sarah Rogers, Professional Bird Illustrator
By combining a detailed knowledge of bird anatomy with careful observation of postures and feather patterns, you can improve the accuracy and realism of your hummingbird drawings. Embrace the opportunity to study real-life hummingbirds, consult high-quality photographs, and practice your skills to create captivating and lifelike hummingbird art.
Capturing Motion: Drawing Hummingbird Wings and Flight
One of the most vital aspects of creating a dynamic and lifelike hummingbird drawing is the mastery of capturing motion. In the case of hummingbirds, this mainly involves depicting their rapid wing flapping and unique flight patterns. To accurately represent these movements, we must pay close attention to detail and observe the bird in motion, either from real-life experiences or high-quality reference materials.
During their flight, hummingbirds can hover, fly forward, backward, and even upside down, making them fascinating and complex subjects to draw. Here, we will explore essential tips and techniques for capturing the motion of hummingbird wings and flight in your artwork.
Understanding Wing Movement
Hummingbirds have unique and rapid wing movements, flapping their wings in a figure-eight pattern. Depending on the species, they can flap up to 15-80 times per second, which gives them their distinctive, hovering flight. To capture this motion, it’s crucial to understand the various positions and angles of the bird’s wings during flight.
Upstroke: During the upstroke, the wings move forward and upward, almost parallel to the bird’s body. The wings bend at the elbow joint, bringing them close to the head.
Downstroke: In the downstroke, the wings move backward and downward, extending fully and nearly touching the bird’s tail.
By observing and understanding these wing positions, you can create a more accurate and expressive representation of a hummingbird in flight.
Creating the Illusion of Speed and Motion
Effectively conveying motion in a static drawing can be challenging, but several techniques can help achieve the desired effect:
Motion Lines – Use several parallel lines or curved lines to suggest movement. These lines indicate the path of the wings during the flight and add a sense of speed to your drawing.
Blurred Edges – By adding a light, blurred effect around the edges of the wings, you can create the illusion of rapid movement. Avoid overdoing this effect lest it detract from the drawing’s overall sharpness and clarity.
Feather Details – Accurate portrayal of delicate feathers is crucial to enhancing the feeling of movement. Take into consideration how the feathers respond to air pressure and flexibility of the wing structure during flight.
Make sure to reference high-quality photographs or videos of hummingbirds in flight while working on your drawing. This will enable you to capture the nuances of their wings and overall movement, elevating the realism and dynamism of your artwork.
Enhancing Realism: Shading Techniques and Texture Details
Shading is a critical technique for achieving depth and realism in a hummingbird drawing. An understanding of how light affects the appearance of birds allows an artist to create a sense of volume and dimension in their work. In this section, we will discuss the role of light in shading your hummingbird and explore techniques to render textures in both feathers and the environment.
The Role of Light in Shading Your Hummingbird
Knowing how light interacts with your subject is essential for adding just the right touch of dimension, depth and perspective. For example, pay close attention to:
Direction of light: Determine from which angle the light source is illuminating the bird to create shadows in the appropriate areas.
Value range: Use a variety of values (the difference between light and dark) when shading to create a more realistic three-dimensional effect.
Edge transitions: Soften or sharpen the transitions between light and shadow to create the illusion of depth.
Reflected light: Consider adding subtle bounced light to illuminate areas in shadow, giving an extra layer of depth to your drawing.
Incorporate these lighting principles in your shading process to evoke a sense of realism and depth in your hummingbird drawing.
How to Render Textures: Feathers and Environment
The ability to render various textures, especially the soft, delicate feathers of a hummingbird, can significantly elevate a drawing. To create a rich illusion of texture, follow these steps:
Observe closely: Study the texture of both the hummingbird’s feathers and its environment to identify subtle variations in surface patterns.
Pencil pressure: Apply varying levels of pressure with your pencil to create depth in texture, ranging from delicate lines to bold strokes.
Layering: Build up layers with different grayscale values to achieve a sense of volume and three-dimensionality.
Blending: Use blending techniques, such as softening edges and transitions, to seamlessly integrate textures into the surrounding environment.
Beyond the plumage, consider capturing the diversity of surface textures in the bird’s habitat. Incorporating natural elements adds both context and visual interest to your composition and contributes to a richer, more tangible portrayal of the hummingbird.
As you master shading techniques and pay close attention to textures in your hummingbird drawings, you will notice increased depth and realism in your work. Remember that practice and observation are key when capturing the beauty of these enchanting creatures.
Pencil to Color: Introducing Vibrancy to Your Hummingbird Art
Transitioning from pencil sketches to colored renderings involves an understanding of color theory. Skillfully applying color to a hummingbird drawing can bring the piece to life, enhancing its vibrancy and appeal. An appreciation for the play of colors in nature assists the artist in making choices that both delight the eye and maintain realism.
Color Theory Basics for Lively Drawings
Color theory forms the foundation for creating harmonious, captivating, and realistic art. For hummingbird drawings, it’s essential to grasp basic principles like the color wheel, color harmony, and color context to achieve an accurate and dynamic representation of these vibrant birds. Keep in mind these fundamental aspects as you dive into color theory:
Primary colors: Red, blue, and yellow are the cornerstone hues that cannot be created by mixing other colors. All other colors stem from these three primary colors.
Secondary colors: Combining primary colors creates secondary colors. Mixing red and blue generates purple, blue and yellow make green, and red and yellow creates orange.
Tertiary colors: Mixing a primary color with a secondary color results in tertiary colors, such as yellow-orange, red-orange, red-purple, blue-purple, blue-green, and yellow-green.
Color harmony: Relationships among colors on the color wheel create harmonious color schemes that lead to visually balanced and appealing art. Examples include complementary, split-complementary, and analogous color combinations.
Value and saturation: The lightness or darkness (value) and intensity (saturation) of a color are essential factors to consider for balancing and adding depth to your drawings.
When coloring your hummingbird artwork, observe the vibrant hues and subtle nuances in the bird’s plumage. Incorporating these color variations accurately results in a more lifelike and fascinating piece.
“The colors of a hummingbird’s feathers, glittering like jewels, are the result of their microscopic structure rather than pigmentation. This iridescent effect, known as structural coloration, contributes to the shimmering, ever-changing display we see.”
Understanding and applying color theory allows artists to create captivating hummingbird drawings that capture a bright, lively, and realistic essence. Through practice and careful observation, one can skillfully apply color to their hummingbird sketches, enhancing its impact and capturing the bird’s unique beauty.
Perfecting the Hummingbird Beak and Eyes: Tips and Tricks
Focusing on the beak and eyes, key features of the hummingbird’s visage, requires careful attention to detail. The right technique and a nuanced approach can result in a remarkably lifelike and expressive drawing. Tips and tricks for capturing these finer details can help artists convey the bird’s character and enhance the overall realism of the piece.
When drawing the hummingbird beak, use your drawing tools and surface with precision. The beak’s slender and straight shape should be accurately represented. To achieve this:
Pay attention to the beak’s length and angle for accurate proportions.
Outline the beak lightly in the initial sketch, ensuring a strong but delicate appearance.
Refine the beak’s edges and shading to emphasize its delicate form, creating a sense of dimension and depth.
Consider the bird’s perspective when illustrating the beak, as this can greatly affect its appearance, altering its perceived length and angle.
Next, concentrate on the hummingbird’s eyes, which are vital in conveying the bird’s character and emotion. Consider the following tips when drawing the eye:
Properly position the eye within the face, capturing the correct size and shape.
Observe the curvature of the eye-socket and carefully mimic its contours to create a realistic form.
Include intricate details such as the pupil, iris, and highlights, which can define the direction of the bird’s gaze.
Use shading to emphasize the roundness of the bird’s eye and emphasize the relationship between light and shadow to create depth.
When combining both the beak and the eyes, ensure that the overall proportions and appearance are cohesive, maintaining a balanced look throughout the face of the hummingbird. Not only will this achieve a higher level of realism, but it will also provide your artwork with more character and emotion, bringing your hummingbird drawing to life.
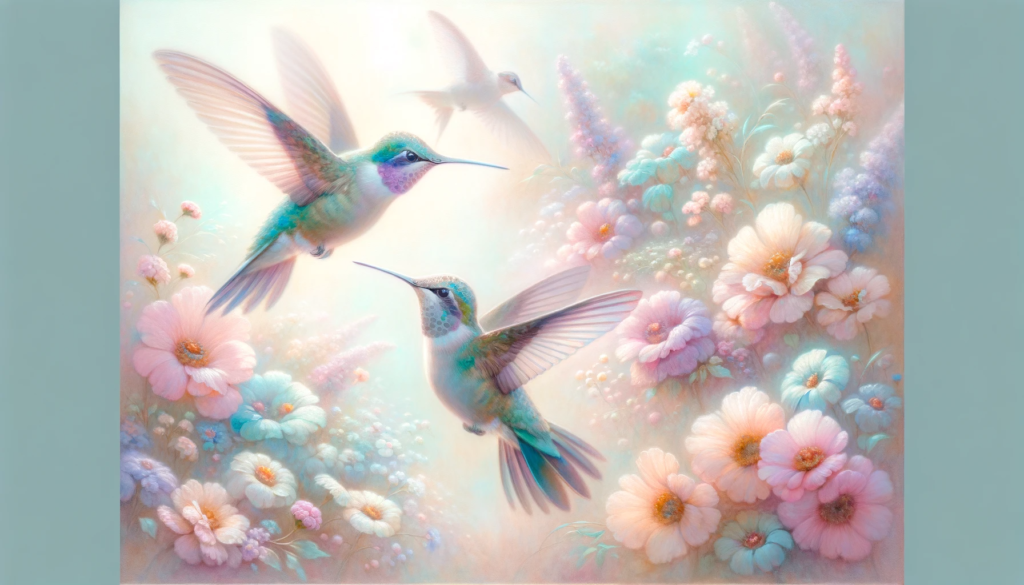
Enliven Your Art: Background Considerations for Hummingbird Illustrations
The background is more than just a decorative element in your hummingbird artwork; it provides context and depth that enriches the overall composition. To truly captivate your viewer and create a cohesive scene, you should devote attention to the background elements and how they relate to your subject. In this section, we delve into various ideas for effectively incorporating the hummingbird’s natural habitat into your drawings, enhancing the illustration’s visual impact.
Creating Depth and Context in Your Drawings
Whether your drawing is a minimalist sketch or a detailed work, you can establish depth and context by including elements of the hummingbird’s environment. Consider the following factors to create a harmonious and engaging composition:
Placement of elements: Positioning your subject and background objects in a thoughtfully arranged composition allows the viewer’s eye to intuitively move around the scene. Consider creating a focal point with your hummingbird and using the other elements to provide context and depth.
Scale and perspective: Employing appropriate scaling and perspective contributes to the overall sense of depth in the drawing. Larger objects should be closer to the foreground, while smaller objects recede into the background.
Use of light and shadow: The artistic application of light and shadow can add three-dimensionality and drama to your composition. Carefully consider the light source and how it casts shadows throughout the scene.
Color choices: Selecting the right balance of colors is essential for creating harmony and visual appeal in your artwork. Pay close attention to the color palette, opting for colors that complement the hummingbird and suit the mood of the illustration.
“The background is the first and last thing an artist should think of.” – Henri Matisse
By incorporating elements of the hummingbird’s habitat into your composition, you can effectively establish depth, context, and a sense of immersion that will captivate your viewers. Here are some background elements you might consider including:
Element
Description
Flowers
As natural sources of nectar, flowers are crucial components of a hummingbird’s environment. Add life to your illustration by drawing popular hummingbird favorites like trumpet vines, bee balm, or salvia.
Trees and branches
These provide perching points and nesting materials for hummingbirds. Capture the essence of their habitat by including tree limbs or branches of varying sizes and shapes.
Water sources
Whether a bubbling fountain or a shallow birdbath, water sources are essential for hummingbirds in their daily lives. Depicting these sources adds interest and depth to your drawing while reinforcing its natural setting.
Atmospheric elements
Consider incorporating sunbeams or dappled light filtering through leaves to evoke a tranquil, sunlit scene. Alternatively, add movement with a gentle wind or the dramatic flair of a stormy sky.
Whether you choose to incorporate one or all of these elements, consider how they interact with your hummingbird subject to create an immersive and dynamic illustration that reflects the beauty and complexity of the natural world.
Branching Out: Exploring Different Mediums for Hummingbird Art
While pencil sketches are an excellent starting point for aspiring artists, experimenting with various mediums can tremendously expand the possibilities in your hummingbird art. Diversifying your approach opens doors for fresh, innovative expressions of creativity and unveils new ways to capture the allure of these fascinating birds. The following are some popular mediums to consider when branching out in your artistic journey:
Acrylics
Watercolors
Digital tools
Charcoal
Each medium possesses unique properties, allowing you to explore different techniques and textures to emphasize the stunning details and colors of hummingbirds. Acrylics and watercolors, for instance, grant you the freedom to layer colors and bring vibrancy to your creations, while charcoal provides a rich texture and depth to your drawings.
Digital tools, such as graphic tablets and software like Adobe Photoshop or Procreate, empower artists by offering a virtually limitless range of artistic possibilities. The flexibility and features of these programs facilitate experimenting with brushes, colors, layers, blending modes, and more.
Remember, there’s no “right” medium for hummingbird art. The best choice for you depends on your individual preferences and goals.
Experimenting with different mediums not only refines your artistic skills but also broadens your understanding of hummingbirds’ visual beauty. Start with a medium that resonates with you and gradually explore other options to further your creative growth. The table below showcases a comparative overview of the discussed mediums’ unique features:
Medium
Advantages
Challenges
Acrylics
Quick-drying, versatile, easy to layer colors
Can be difficult to blend, fast drying time requires rapid work
Watercolors
Luminosity, transparency, portability
Control and mastery require experience and patience
Digital tools
Unlimited freedom, flexible, easily editable
Requires knowledge of software, expensive equipment
Charcoal
Rich texture, variety of values, bold strokes
Messy, smudging can be an issue
Ultimately, exploring different mediums for your hummingbird art can reinvigorate your enthusiasm, inspire fresh ideas, and deepen your connection to the creative process. Whether working with traditional or digital mediums, nurturing your passion for art can transform your journey as an artist and enhance your appreciation of hummingbirds’ captivating beauty.
Conclusion
In conclusion, mastering the art of hummingbird drawing involves a combination of astute observation, a deep understanding of bird anatomy, and the development of technique across various mediums. By engaging frequently with your art, experimenting with diverse tools, and drawing from real life or high-quality photographs, you can create mesmerizing, lifelike hummingbird art.
When embarking on this artistic journey, always remember to credit the photographers and reference materials you use, as this not only acknowledges their work but also showcases your professionalism and commitment to artistic authenticity.
Keep learning from each endeavor and stay curious about new techniques, tools, and mediums. Through persistence, exploration, and dedication to your craft, you’ll certainly transform into a skilled and accomplished hummingbird artist, capturing the essence of these remarkable creatures with every pencil stroke and brushstroke.
FAQ
What is the best approach to start drawing a hummingbird?
Begin by focusing on basic shapes and proportions rather than intricate details. Start with a simple line for posture, followed by an oval for the body and a circle for the head. This will help establish an accurate silhouette before adding further details like beak, eye, and feathers.
How important is understanding bird anatomy for hummingbird drawing?
A profound understanding of bird anatomy, including the positioning of feathers on the body and how they grow, is crucial for creating a realistic portrayal. Recognizing feather groups and their natural patterns is essential to accurately capturing a hummingbird’s silhouette and defining the species’ appearance.
How can I improve my hummingbird wing drawings?
To effectively capture the rapid movement of hummingbird wings, observe and reproduce their movement patterns and flight dynamics. Precise observation and practice will help you add life and realism to your hummingbird sketches.
What shading techniques should I use to enhance realism in my hummingbird drawings?
Understand the role of light in shading, as it creates a sense of volume and dimension in your artwork. The interplay of light and shadow can bring out the intricate textures and form of the hummingbird, making your drawings more realistic.
How can I introduce color into my hummingbird art?
To transition from pencil sketches to colored renderings, develop an understanding of color theory. Skillfully applying color to your hummingbird drawings can enhance vibrancy and appeal, while an appreciation for the play of colors in nature can help maintain realism.
What materials should I use for hummingbird drawing?
Use a graphite pencil or Col-Erase non-photo blue pencil for initial sketching, and select paper with appropriate texture and weight to suit your preferred drawing medium. Also, choose the right pencil type for details and erasers that allow for easy modification and refinement throughout the drawing process.
How can I incorporate background elements into my hummingbird illustrations?
Thoughtful consideration of the hummingbird’s natural habitat and the interaction between background and subject can create a cohesive and immersive illustration. Including elements such as flowers, branches, or leaves can add depth and context to your artwork.
What other mediums can I explore for hummingbird art?
Beyond pencil sketches, try experimenting with mediums such as acrylics, watercolors, digital tools, and charcoal to expand your hummingbird art repertoire. Each medium offers unique qualities and allows for different expressions of creativity, inspiring new approaches in capturing the beauty of hummingbirds.