In this section, I will share with you the secrets to drawing flowers with precision and grace. Whether you’re a beginner or a seasoned artist, this flower drawing tutorial will provide step-by-step instructions and expert tips to help you create stunning floral sketches. Unlock your artistic skills and delve into the world of floral art with me as your guide.
Key Takeaways:
- Learn how to draw a flower step by step.
- Master the art of flower drawing with precision and grace.
- Discover expert tips and techniques for creating beautiful floral sketches.
- Unlock your floral mastery and unleash your creativity.
- Whether you’re a beginner or an experienced artist, this flower drawing tutorial will help you bring your artistic vision to life.
Gearing Up: Choosing the Right Drawing Tools for Your Floral Art

Before you start drawing flowers, it’s important to choose the right tools for the job. In this section, I will discuss the various drawing tools that are essential for creating stunning floral art. From pencils and erasers to sketchbooks and color pencils, I will guide you in selecting the best tools for your artistic journey.
“Every artist has their own preference when it comes to drawing tools. It’s important to find the tools that feel comfortable and allow you to express your creativity.”
When it comes to drawing tools, there are a few key essentials to consider:
- Pencils: Start with a set of high-quality graphite pencils. They come in different hardness levels, ranging from soft to hard, allowing you to achieve a variety of tones and textures in your drawings. Experiment with different pencils to find the ones that suit your style best.
- Erasers: Erasers are essential for correcting mistakes and smudges. Invest in a good quality kneaded eraser for precise erasing and a soft gum eraser for larger areas. These erasers are gentle on the paper and won’t damage your artwork.
- Sketchbooks: Choose a sketchbook that has quality, acid-free paper. This ensures that your drawings will last longer and won’t yellow over time. Spiral-bound sketchbooks are convenient as they allow you to easily flip and fold the pages.
- Color Pencils: If you want to add color to your floral art, invest in a set of color pencils. Look for pencils with a wide range of colors and a smooth, blendable texture. Experiment with layering and blending to create depth and vibrancy in your artwork.
These are just a few of the essential drawing tools for your floral art journey. Remember to choose tools that feel comfortable in your hand and allow you to bring your creative vision to life. Now that you have your drawing tools ready, it’s time to dive into the basics of drawing a flower. But before we do that, let’s take a closer look at the anatomy of a flower to understand its structure and form.
Starting Simple: The Basics of Drawing a Flower

In this section, we will delve into the fundamentals of drawing a flower. Whether you are a beginner or an experienced artist, understanding the basics is crucial for creating accurate and aesthetically pleasing flower sketches.
Understanding Flower Anatomy for Accurate Sketches
Before you begin sketching a flower, it is essential to have a good grasp of its anatomy. By familiarizing yourself with the different parts of a flower, you will be able to accurately depict its structure in your drawings.
Flower anatomy consists of several key components:
- Petal: The colorful and often fragrant part of the flower that attracts pollinators.
- Stamen: The male reproductive organ, comprising the anther and filament.
- Pistil: The female reproductive organ, consisting of the stigma, style, and ovary.
- Sepal: The leaf-like structure that protects the flower bud.
- Receptacle: The base of the flower where all the floral parts are attached.
Having a clear understanding of flower anatomy will enable you to accurately depict the shape, size, and position of these components in your sketches.
Sketching Your First Petal: Tips and Techniques
When it comes to drawing flowers, the petal is often the most prominent and visually appealing part. Sketching petals requires careful observation and attention to detail.
Here are some tips and techniques for sketching your first petal:
- Start with a basic outline: Begin by lightly sketching the outline of the petal shape using soft pencil strokes.
- Build volume and form: Add shading and hatching to create the illusion of three-dimensional form. Pay attention to the direction of light and shadow to make the petal appear more realistic.
- Refine details: Use a sharp pencil to add intricate details such as veins or texture to the petal. Observing the petal closely will help you capture these finer elements accurately.
Remember, practice is key when it comes to petal sketching. The more you observe, sketch, and refine your technique, the better you will become at capturing the delicate beauty of flower petals in your drawings.
Creating Symmetry and Balance in Flower Drawings
Symmetry and balance play crucial roles in creating visually pleasing flower drawings. By ensuring that your floral compositions are harmonious and well-proportioned, you can elevate the overall aesthetic appeal of your artwork.
Here are some tips for creating symmetry and balance in your flower drawings:
- Focus on overall composition: Consider the placement and arrangement of various floral elements within your drawing. Distribute the petals, leaves, and stems evenly to achieve a sense of balance.
- Pay attention to proportions: Ensure that the size and shape of each flower component are visually proportional to one another. This will help create a sense of harmony and symmetry in your artwork.
- Use visual cues: Incorporate elements such as leading lines or focal points to guide the viewer’s eye and create balance within the composition.
By implementing these principles, you can create captivating and visually appealing flower drawings that convey a sense of equilibrium and elegance.
| Component | Description |
|---|---|
| Petal | The colorful and often fragrant part of the flower that attracts pollinators. |
| Stamen | The male reproductive organ, comprising the anther and filament. |
| Pistil | The female reproductive organ, consisting of the stigma, style, and ovary. |
| Sepal | The leaf-like structure that protects the flower bud. |
| Receptacle | The base of the flower where all the floral parts are attached. |
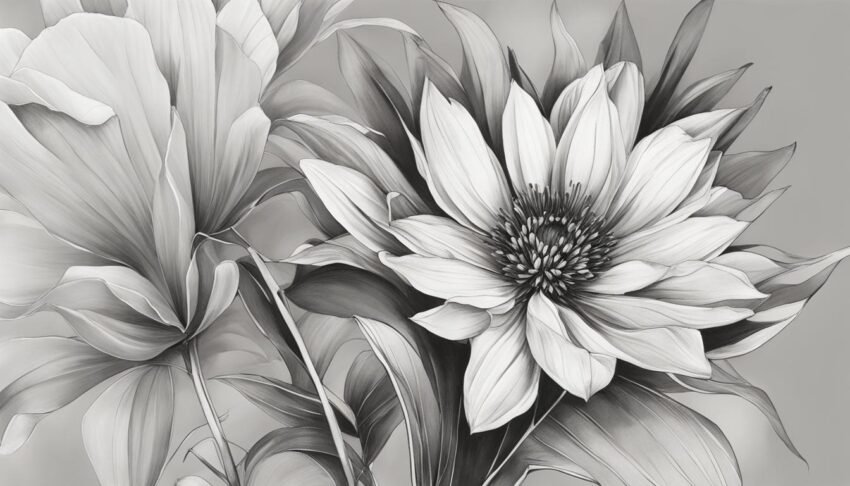
How to Draw a Flower: Step-by-Step Instruction

Are you ready to bring your artistic vision to life with a stunning flower drawing? In this section, I will guide you through a step-by-step tutorial on how to draw a flower. Follow along and discover the techniques and methods that will help you create a realistic and captivating floral artwork.
Step 1: Begin by sketching the outline of the flower. Use light, gentle strokes to create the basic shape of the petals and the center of the flower. Remember to keep your lines loose and fluid, as flowers have natural curves and irregularities.
Step 2: Now, focus on adding details to your flower. Observe the flower you are drawing closely and notice the unique characteristics of its petals and leaves. Use short, curved lines to depict the delicate folds and contours of the petals. Pay attention to the varying shapes and sizes of each petal, as this will add depth and dimension to your drawing.
Step 3: Once you have added the details to the petals, move on to the center of the flower. Capture the intricate patterns and textures of the flower’s reproductive organs using fine lines and dots. This will bring your drawing to life and make it more realistic.
Step 4: After completing the petals and the center, it’s time to add the stem and leaves. Use long, flowing lines for the stem, and depict the leaves with simple shapes and curves. Remember to vary the direction and angles of the leaves to create a natural and organic look.
Step 5: Now that you have finished sketching your flower, it’s time to add shading and depth. Determine the direction of the light source and use cross-hatching or shading techniques to create highlights and shadows. This will make your flower drawing more three-dimensional and visually appealing.
Step 6: Lastly, add any additional details or embellishments to enhance your flower drawing. This could include adding subtle color with colored pencils or experimenting with different textures using various shading techniques.
With this step-by-step flower drawing tutorial, you now have the tools and knowledge to create beautiful floral artwork. Practice, experiment, and let your creativity blossom as you perfect your flower drawing skills. Happy drawing!
Smelling the Roses: Mastering the Art of Rose Sketching

Roses have long been admired for their timeless beauty and delicate charm. Mastering the art of drawing these captivating flowers is a pursuit that allows us to capture and appreciate their essence on paper. In this section, we will delve into the world of rose sketching, exploring the intricacies of rose petals and layers, and uncovering the techniques to bring a blossoming rose to life through our drawings.
Breaking Down the Complexity: Rose Petals and Layers
The beauty of roses lies in the intricate details of their petals and layers. To accurately depict a rose, it is crucial to understand its anatomy and structure. Each petal contributes to the overall shape and form of the flower, weaving together to create its distinct beauty. By breaking down the complexity of rose petals and layers, we can begin to understand how to translate their intricacy onto paper.
When sketching rose petals, pay close attention to their shape, curvature, and patterns. Use gentle strokes to capture the delicate folds and contours of each petal. Focus on the subtle transitions from light to shadow, highlighting the play of light on the petal’s surface. The key to mastering rose sketching lies in observing the unique characteristics of each petal and replicating them with precision.
Capturing the Essence of a Blossoming Rose
As an artist, it is not only important to accurately depict the physical aspects of a rose but also to capture its essence and spirit. A blossoming rose represents vitality, growth, and the beauty of nature’s constant renewal.
To truly capture the essence of a blossoming rose, focus on the graceful movement of its petals and the sense of life and energy within the flower. Experiment with different angles and perspectives to convey the rose’s dynamic nature. Use shading techniques to create depth and dimension, allowing the viewer to feel as if they are witnessing the rose in its blooming glory. By infusing your sketches with emotion and vitality, you can fully convey the essence of a blossoming rose.
As we delve into the world of rose sketching, we embark on a journey of artistic expression and appreciation for the beauty of nature. Through patience, observation, and practice, we can master the art of capturing the intricate details and essence of a beautiful rose on paper.
The Delicate Dance: Pencil Techniques for Drawing Delicate Flower Petals

Drawing delicate flower petals requires precision and skill. To create realistic and detailed flower drawings, it is essential to master specific pencil techniques. In this section, I will guide you through the process of using light and shade to add depth to your floral artwork. Additionally, I will demonstrate how to perfect petal textures with intricate pencil strokes.
Using Light and Shade to Create Depth
Light and shade play a crucial role in bringing your flower drawings to life. By carefully observing your reference image or a real flower, identify the areas of light and shadow. Use varying degrees of pressure on your pencil to achieve different tones.
Start by lightly sketching the outlines of the petals. Then, using a blending tool or your finger, gently smudge the edges to create a soft transition between light and shadow. Gradually build up the shading, paying attention to the direction of the light source.
Pro Tip: To add depth and dimension, create areas of strong contrast between light and shadow. This will make your flower petals appear three-dimensional.
Remember to observe the interplay of light and shade on each individual petal. Some petals may have intricate folds or overlapping layers, requiring careful attention to detail.
Perfecting Petal Textures with Pencil Strokes
The texture of flower petals greatly impacts the overall realism of your drawings. To capture the delicate surfaces of petals, experiment with different pencil strokes.
Parallel Hatching: Create parallel lines closely spaced together to mimic the smoothness of certain petals.
Cross Hatching: Combine layers of parallel lines in different directions to add texture and depth to your petal surfaces.
Scribbling: Use rapid, controlled scribbling motions to depict rough or textured petals, such as those found in roses or carnations.
By mastering a variety of pencil strokes, you can enhance the realism of your flower petals and bring them to life on paper.
Summary
In this section, I discussed the importance of pencil techniques for drawing delicate flower petals. By using light and shade, you can create depth and make your drawings appear three-dimensional. Additionally, perfecting petal textures with various pencil strokes adds realism to your artwork. Now that you have learned these techniques, practice and experiment to develop your unique style of drawing flower petals.
Exploring the Color Palette: Flower Drawing in Watercolor and Ink

Adding color to your flower drawings can bring them to life. In this section, we will explore the use of watercolor and ink in flower drawing. We will discuss techniques for creating vibrant and expressive floral illustrations and provide tips on using different colors to enhance your artwork.
Watercolor and ink are two versatile mediums that offer unique qualities and effects when used in flower drawing. Watercolor allows for the creation of soft and translucent washes, while ink provides bold and precise lines. By using these mediums, you can add depth, texture, and a sense of realism to your floral art.
To achieve stunning watercolor effects, start by selecting a high-quality watercolor paper that can withstand the water and pigment. Use a range of brushes to create different textures and strokes, such as flat brushes for broad washes and pointed brushes for fine details. Experiment with wet-on-wet and wet-on-dry techniques to achieve various effects and create depth in your flower drawings.
“Watercolor has a beautiful translucency that can capture the delicate nature of flowers. By layering washes of different colors, you can achieve vibrant and realistic floral illustrations.”
Ink illustrations, on the other hand, offer a bold and graphic appeal to flower drawings. Start by using waterproof and archival ink pens with different nib sizes to create varying line weights. Experiment with crosshatching, stippling, and other mark-making techniques to add texture and detail to your floral illustrations.
When combining watercolor and ink, you can create stunning mixed media flower drawings. Begin by sketching the outlines of your flowers and leaves using ink, and then add watercolor washes to bring them to life. The juxtaposition of the bold ink lines and the delicate watercolor adds visual interest and complexity to your artwork.
Remember to explore different color palettes when working with watercolor and ink. Whether you choose a monochromatic scheme or a vibrant array of colors, selecting the right hues can enhance the mood and overall impact of your floral illustrations.
Watercolor vs. Ink for Flower Drawing
| Watercolor | Ink |
|---|---|
| Creates soft and translucent washes | Provides bold and precise lines |
| Allows for layering and building up of colors | Offers graphic and contrasting effects |
| Produces subtle gradients and blending | Creates strong contrasts and textures |
| Requires a watercolor paper and brushes | Uses waterproof and archival ink pens |
Spring Blooms to Life: Drawing a Variety of Seasonal Flowers

Spring is a season of vibrant and beautiful blooms. As an artist, it’s the perfect time to draw inspiration from nature and capture the essence of spring in your floral artwork. Drawing seasonal flowers allows you to explore the unique shapes, colors, and textures that define each bloom. From delicate cherry blossoms to vibrant tulips, there is a wide variety of spring flowers that you can bring to life on the page.
To start your journey of drawing spring blooms, it’s important to observe and study the flowers that are in season. Take walks in gardens or parks, visit flower markets, or even look up reference photos online. Notice the intricate details of each flower, such as the petals, leaves, and stems. Pay attention to the color variations and the way light interacts with the petals. This careful observation will help you create more accurate and realistic drawings.
When drawing seasonal flowers, remember to consider the composition of your artwork. Think about how the flowers will interact with each other and the overall layout of the piece. You can create depth and dimension by overlapping the flowers or positioning them at different heights. Experiment with different arrangements and find a composition that best captures the essence of spring.
To enhance the visual appeal of your spring flower drawings, consider adding other elements such as insects, birds, or even a beautiful landscape in the background. These additional elements can create a story and add interest to your artwork.
Now, let’s take a look at an example of a beautiful spring flower drawing:
In this drawing, the artist has captured the elegance and beauty of a bouquet of seasonal flowers. The colorful tulips and daffodils are arranged in a way that creates a pleasing composition. The attention to detail in the petals and leaves adds depth and realism to the artwork. The vibrant colors and the delicate lines truly bring the spring blooms to life.
Remember, drawing seasonal flowers is all about capturing the spirit of nature and expressing your creativity. Embrace the beauty of spring and let it inspire your floral artwork. With practice and patience, you will be able to create stunning drawings that celebrate the joy and vibrancy of spring blooms.
Nurturing Creativity: Advancing to Complex Floral Compositions

Now that you have mastered the basics of flower drawing, it’s time to take your artistic skills to the next level. In this section, I will share techniques and tips for advancing your flower drawing abilities and exploring complex floral compositions. By unlocking your creativity, you can create intricate and captivating floral artwork that showcases your unique style and vision.
Creating complex floral compositions allows you to express your creativity in new and exciting ways. It involves combining different types of flowers, arranging them in visually appealing patterns, and playing with colors, textures, and perspectives. With practice and experimentation, you can achieve stunning results that will leave viewers in awe of your artistic talent.
To create complex floral compositions, consider the following techniques:
- Experiment with Various Flower Types: Incorporate a diverse range of flowers in your compositions to add interest and depth. Combine different shapes, sizes, and petal arrangements to create visually dynamic artwork.
- Explore Unique Perspectives: Play with different viewpoints to bring a fresh perspective to your compositions. Try drawing flowers from unusual angles or zoom in on specific details to create a sense of intimacy and intrigue.
- Consider Complementary Colors: Use the color wheel as a guide to select complementary colors for your floral compositions. Combining colors that are opposite each other on the wheel can create visually striking and harmonious artwork.
- Add Depth and Dimension: Experiment with shading, highlighting, and layering to add depth and dimension to your drawings. This technique can make your flowers appear more realistic and three-dimensional.
In order to nurture your creativity and elevate your flower drawing skills, it is important to embrace experimentation and push the boundaries of your artistic comfort zone.
By exploring complex floral compositions, you can challenge yourself to think outside the box and explore new artistic possibilities. Let your imagination soar as you combine different elements and techniques to create truly unique and mesmerizing floral artwork.
Now that you have learned the art of complex floral compositions, it’s time to transfer your flower drawings to paintings. In the next section, we will explore the process of transforming your sketches onto canvas and creating vibrant floral paintings.
From Paper to Canvas: Transferring Your Flower Drawings to Paintings

Taking your flower drawings to the next level, you can transfer them onto canvas and turn them into paintings. In this section, I will cover the process of transferring your flower drawings to paintings. I will provide preparation techniques for painting on canvas and offer guidance on mixing colors to create vibrant and captivating floral artwork.
Preparation Techniques for Painting on Canvas
Before starting your painting, it is essential to prepare the canvas properly. Here are some techniques to ensure a smooth and successful transfer:
- Choose the right canvas: Select a canvas that suits your preference, whether it’s pre-stretched or a canvas sheet.
- Prepare the surface: Apply a coat of gesso primer to the canvas to create a smooth and even surface. This not only prevents the paint from being absorbed but also adds durability to your artwork.
- Sketch the drawing: Use a pencil or charcoal to lightly sketch your flower drawing onto the canvas. This will serve as a guide for your painting.
- Transfer the drawing: You can transfer your drawing onto the canvas using various methods, such as using graphite paper or a grid system. Make sure to transfer the lines accurately to maintain the proportions and details of your original drawing.
Mixing Colors for Vibrant Floral Paintings
Creating vibrant and captivating floral paintings requires a good understanding of color mixing. Here are some tips for mixing colors to bring your flower drawings to life:
- Start with a basic color palette: Begin by mixing primary colors, such as red, blue, and yellow, to create secondary colors. Gradually expand your palette by adding other hues that complement your floral subject.
- Explore color harmonies: Learn about color harmonies, such as complementary, analogous, and triadic, to create harmonious and visually appealing color schemes in your paintings.
- Experiment with mixing techniques: Try different techniques, such as glazing, stippling, or wet-on-wet, to achieve various effects and textures in your floral artwork.
- Observe and study real flowers: Pay attention to the colors and tones found in real flowers. Study how light and shadows interact with different petals and use this knowledge to replicate the natural beauty in your paintings.
By following these preparation techniques and mastering color mixing, you will be able to transfer your flower drawings onto canvas and create vibrant floral paintings that capture the beauty and essence of the subjects.
Conclusion
In conclusion, the art of drawing flowers with precision and grace is a skill that can be learned and mastered. Throughout this guide, we have provided step-by-step instructions, valuable tips, and expert techniques to help you unlock your floral mastery.
Whether you are a beginner or an experienced artist, this comprehensive guide has inspired you to explore the beauty of floral art and create stunning flower drawings. By understanding flower anatomy, sketching petals with accuracy, and creating symmetry and balance in your compositions, you have the foundation to create captivating floral artwork.
Remember, practice is key to perfecting your floral drawing skills. Take the time to experiment with different drawing tools, pencil techniques, and mediums such as watercolor and ink. Embrace the challenge of drawing a variety of seasonal flowers, and don’t be afraid to push the boundaries of your creativity with complex floral compositions.
With dedication and passion, you can transform your flower drawings into vibrant paintings on canvas. Use the preparation techniques shared in this guide, and don’t hesitate to mix colors to create truly vibrant and captivating floral artwork.
FAQ
What tools do I need for drawing flowers?
To draw flowers, you will need essential drawing tools such as pencils, erasers, sketchbooks, and color pencils.
How can I start drawing a flower?
Before you start drawing a flower, it’s important to understand flower anatomy for accurate sketches. Begin by sketching the first petal and focus on creating symmetry and balance in your drawings.
Can you provide a step-by-step guide on drawing a flower?
Absolutely! We have a step-by-step guide that breaks down the process of drawing a flower into simple and easy-to-follow instructions, helping you create a realistic and captivating floral drawing.
What are some tips for mastering the art of rose sketching?
When it comes to rose sketching, it’s important to understand the complexity of rose petals and layers. We provide tips on how to capture the essence of a blossoming rose in your drawings.
Are there any specific pencil techniques for drawing delicate flower petals?
Yes, there are! We delve into pencil techniques that can help you achieve realistic and detailed flower petals. We discuss the use of light and shade to create depth and provide guidance on perfecting petal textures with pencil strokes.
How can I add color to my flower drawings?
Adding color to your flower drawings can bring them to life. We explore the use of watercolor and ink in flower drawing and provide techniques for creating vibrant and expressive floral illustrations.
Can you provide inspiration for drawing seasonal flowers?
Of course! Drawing seasonal flowers is a great way to capture the essence of different seasons. We provide inspiration and guidance for drawing a variety of seasonal flowers, from cherry blossoms to tulips.
How can I advance my flower drawing skills?
Once you have mastered the basics, we provide tips and techniques for advancing your flower drawing skills. You will learn how to create intricate and captivating floral compositions that showcase your artistic vision and style.
How do I transfer my flower drawings to canvas for painting?
If you want to take your flower drawings to the next level, we cover the process of transferring them to paintings on canvas. We provide preparation techniques for painting on canvas and offer guidance on mixing colors to create vibrant and captivating floral artwork.
Can you provide a conclusion to the guide on drawing flowers?
Drawing flowers with precision and grace is an art form that can be learned and mastered. Throughout this guide, we have provided step-by-step instructions, tips, and techniques to help you unlock your floral mastery. We hope that this guide inspires you to explore the beauty of floral art and create stunning flower drawings.