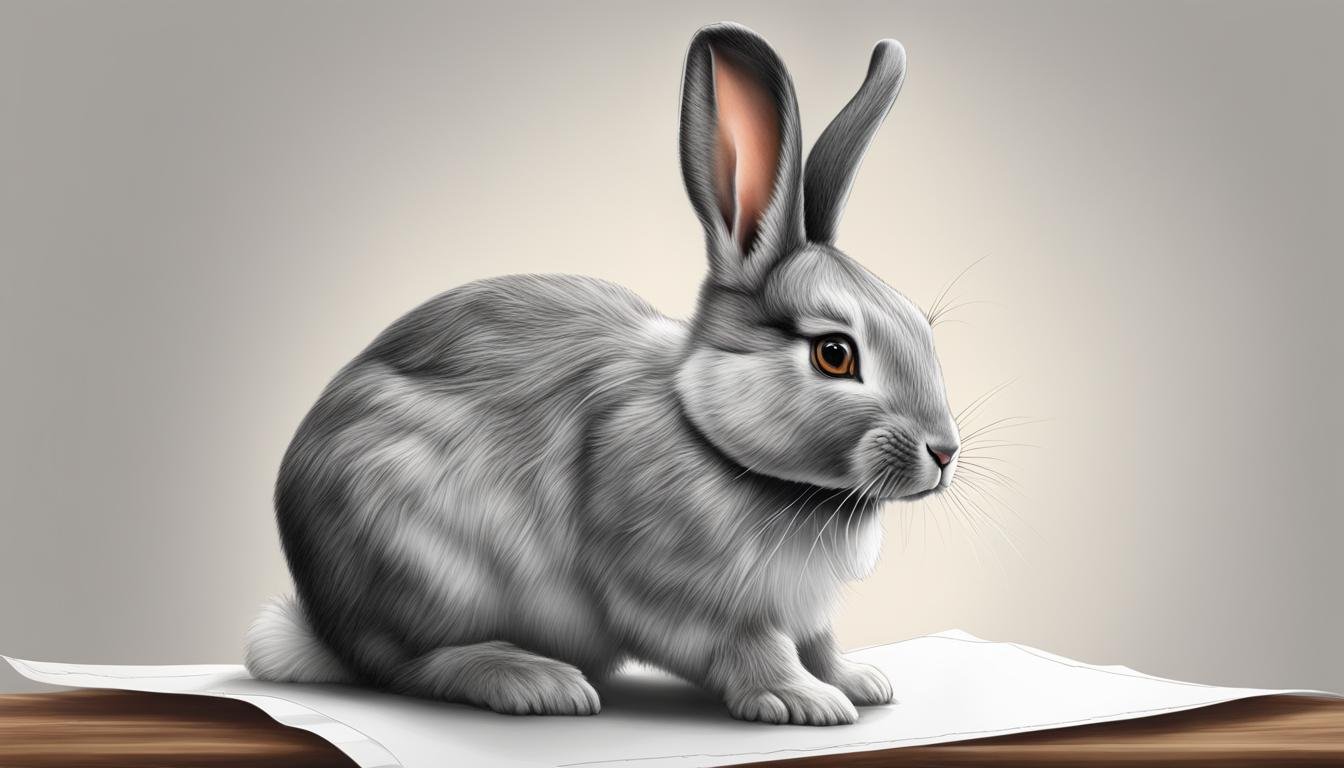
Have you always wanted to learn how to draw a rabbit but found yourself overwhelmed by the task? Fear not, budding artists! With this easy rabbit drawing tutorial, you’ll be confidently sketching these adorable creatures in no time. I have created a step-by-step rabbit drawing guide that will break the process down into simple stages, allowing even beginner artists to create a realistic rabbit sketch. This rabbit sketching guide will cover everything from understanding the anatomy of a rabbit to the techniques required for rendering fur textures. So grab your pencils, and let’s get started!
Understand the unique anatomy of rabbits for a more accurate drawing
Begin your drawing with basic shapes to establish the structure and proportions
Focus on key physical features, such as the rabbit’s ears, legs, and paws
Master shading techniques and fur patterns to create a realistic rabbit drawing
Add character by paying attention to details like whiskers, eyes, and tails
Introduction to Rabbit Drawing
Drawing rabbits, while seemingly daunting due to their detailed anatomy and fur, can be approached in a structured manner to yield adorable results. This introduction to rabbit drawing will acquaint artists with the fundamentals, aiming for a representation that captures the essence of this charming creature.
In order to create a realistic rabbit drawing, it’s essential to learn about the different rabbit drawing techniques. From simple rabbit drawings for beginners to more advanced techniques for seasoned artists, a vast array of options is available to cater to different skill levels and preferences.
To help you get started, let’s explore some of the essential rabbit drawing fundamentals:
Rabbit Drawing Tutorial: To develop your artistic skills, consider following a rabbit drawing tutorial, which guides you step-by-step through various techniques and methods.
Cute Rabbit Drawing Ideas: Let your creativity shine by illustrating rabbits in various poses or experimenting with unique accessories, expressions, or surroundings.
Realistic Rabbit Drawing Techniques: Master the art of capturing intricate details, such as fur texture, movement, and the proper anatomy, to create realistic rabbit drawings.
Simple Rabbit Drawing: As a beginner, focusing on simple rabbit drawings can help build a strong foundation before advancing to more complex techniques.
Besides practicing, education and exposure to various rabbit art styles can help improve your skills. Take a look at the following table, which introduces several artists renowned for their rabbit drawings:
Artist
Rabbit Drawing Style
Beatrix Potter
Charming, anthropomorphic rabbits in storybook illustrations.
Albrecht Dürer
Realistic and highly detailed rabbit drawings using watercolor and pencil.
Polona Lovšin
Whimsical and playful rabbit illustrations for children’s books.
Kendyll Hillegas
Colorful, realistic, and textured rabbit drawings using mixed media.
As you embark on your journey towards mastering rabbit drawing, embrace a positive outlook and a willingness to learn. Delve into rabbit drawing tutorials, explore various rabbit drawing techniques, and draw inspiration from cute rabbit drawing ideas. With consistent practice and dedication, you will soon be able to create captivating, realistic rabbit drawings or simple rabbit drawings that exude the charm and beauty of this unique creature.
Understanding the Anatomy of a Rabbit
Recognizing the distinctive structures such as the furry body and long ears is crucial for drawing rabbits accurately. While drawing, it is important to be aware of the differences in anatomy as compared to other animals, which can influence the depiction of movement and posture. In this section, we will explore rabbit anatomy for artists to ensure a detailed rabbit sketch that captures the essence of how rabbits move.
Comparing Rabbit Anatomy with Other Animals
Understanding the key differences in rabbit anatomy, as opposed to other animals like cats and dogs, is essential for capturing their natural movements and postures in your art. Below is a comparison table to help you identify these differences:
Rabbit Anatomy
Other Animals
Long ears, typically over 4 inches in length
Shorter, differently shaped ears
Hind limbs longer and more powerful than front limbs
Front and hind limbs of comparable length and strength
Fur-covered feet with soft pads for grip
Feet with visible claws or toes
Compact, rounded body
Variable body shapes depending on the species
Keeping these differences in mind will enable you to create a more accurate and dynamic representation of a rabbit in your art.
Key Physical Features to Focus On
There are several key features in the rabbit’s anatomy that should be emphasized while drawing to create a true-to-life rabbit sketch. Some of these include:
Rabbit ears: These can measure over 4 inches in length and are an iconic feature of rabbits.
Hind and front legs: The differing lengths and strength of their limbs play a crucial role in their movement and posture.
Fur-covered feet: Unique to rabbits, their soft pads provide optimal grip and should be drawn with care.
“Understanding the intricacies of rabbit anatomy is crucial for creating a true-to-life rabbit sketch that captures the charm and essence of these adorable creatures.”
By focusing on these key physical features and comprehending the differences in rabbit anatomy compared to other animals, you can ensure a detailed rabbit sketch that accurately represents the unique characteristics of these endearing creatures.
Tools and Materials for a Beginner’s Rabbit Sketch
As you embark on your rabbit sketching for beginners journey, having the right tools and materials makes the entire process more enjoyable and ensures smoother progress. In this rabbit art tutorial, we will go over the essential tools for drawing a rabbit and tips on how to get started with your sketch.
Paper: A good quality drawing paper provides a smooth surface for sketching and shading your rabbit.
Pencils: A selection of pencils is crucial to achieve different effects. A 4B pencil is suitable for outlining the rabbit, while a mechanical pencil works great for sketching finer details.
Graphite powder: This is ideal for creating smooth, even shading in your rabbit sketch. Using a soft brush, you can gently apply the graphite to the desired areas.
Soft brush: This tool helps spread the graphite powder and blend the shading to create depth and dimension.
Eraser: A kneaded eraser is perfect for removing unwanted pencil marks and refining your rabbit sketch.
Compass or circle tool: This aids in creating basic geometric shapes for the rabbit’s body structure, ensuring accurate proportions and placement.
Remember, practicing and refining your skills is the best way to improve your rabbit drawing art. Don’t be afraid to explore various techniques and tools to find what works best for you.
With your tools and materials at the ready, you can begin working on your rabbit sketch. Below is a table summarizing the tools and their purpose to help guide you through this process:
Tool
Purpose
Paper
Provides a smooth surface for sketching and shading your rabbit
Pencils (4B and Mechanical)
Helps outline the rabbit and sketch finer details
Graphite Powder
Creates smooth, even shading in your rabbit sketch
Soft Brush
Spreads the graphite powder and blends shading for depth and dimension
Eraser (Kneaded)
Removes unwanted pencil marks and refines the sketch
Compass or Circle Tool
Aids in creating basic geometric shapes for accurate rabbit proportions
As you begin your rabbit drawing journey, remember that practice is essential to progress. By understanding and mastering these tools, you will be well on your way to creating stunning rabbit sketches that capture the essence of these delightful creatures.
Setting Up Your Drawing Space
Creating a comfortable environment for drawing a rabbit is crucial in order to fully focus on the intricate details and enjoy the artistic process. To ensure a pleasurable experience, it is important to set up your drawing space with proper lighting and an ergonomic arrangement.
Considerations
Why It Matters
Recommendations
Comfortable Seating
Prevents fatigue and discomfort during extended drawing sessions
Select an adjustable chair with adequate lower back support
Spacious and Organized Drawing Surface
Allows easy access to necessary tools and room to maneuver
Opt for a desk or table with storage options to keep your materials organized
Proper Lighting
Enables accurate observation of details and colors
Place your drawing surface under a natural light source or use a daylight lamp
Inspiring Ambience
Boosts creativity and motivation
Personalize your drawing space with artwork, plants, and relaxing music
Adequate lighting plays a significant role in the overall quality of your rabbit sketch. Natural light is ideal, but if that is not an option, a daylight lamp can also provide balanced illumination, helping you accurately visualize the details of your drawing.
Stay organized by keeping your drawing tools and materials within reach, yet not cluttering your work surface. Having a clean and orderly drawing space setup streamlines the sketching process and prevents interruptions while looking for specific tools.
“Environment is the third teacher.”
– Loris Malaguzzi, founder of the Reggio Emilia Approach
The positive impact of a well-organized and inspiring drawing space cannot be overstated. Creating art in a comfortable setting will not only enhance your rabbit drawing skills but also bring about a deeper sense of enjoyment and satisfaction from your artistic pursuits.
Starting Your Rabbit Drawing: Basic Shapes
The beginner’s guide to drawing a rabbit emphasizes the importance of starting with basic shapes to form the foundation of your rabbit sketch. By using simple geometric figures such as circles and ovals, you can outline the body and head, ensuring the appropriate proportions are established for further detailing. In this section, we will explore the process of starting your rabbit drawing with these basic shapes.
First, let’s talk about the shapes you’ll be using to initiate your rabbit sketch. The primary shapes you’ll want to focus on are circles and ovals. Circles will help define the head, while ovals are excellent for capturing the shape of the body. Keep in mind that the purpose of these fundamental shapes is to establish a rough outline to work on, so don’t worry if they aren’t perfect at first.
Begin by drawing a circle for the rabbit’s head.
Next, sketch a slightly larger oval for the body, ensuring it aligns appropriately with the head. The oval should be slightly tilted since rabbits tend to have a curved spine.
Add smaller ovals for the front and hind legs, keeping in mind that the hind legs should be larger and more elongated than the front ones.
Finally, sketch smaller circles for the paws.
Remember, practice makes perfect. As you become more experienced in drawing rabbits, you’ll develop a better understanding of the proportions and shapes that make up their unique anatomy.
Once you have established the basic structure of the rabbit using the simple shapes outlined above, you can use these building blocks to refine the drawing further. By starting with the basic shapes in rabbit drawing, you set the groundwork for a successful sketch. Now, you’re ready to proceed with the next steps in your beginner’s guide to drawing a rabbit.
Refining the Rabbit’s Body Structure
After establishing the basic shape of your rabbit using geometric shapes, it’s time to refine the body structure and perfect the proportions. By implementing various rabbit sketching techniques, you can create an accurate and natural-looking rabbit drawing.
Perfecting the Rabbit’s Proportions
Begin by connecting the circles you drew earlier with curved lines to indicate the spine. Since rabbits have a unique anatomy with certain features distinct from other animals, paying attention to details is crucial. Focus on the back feet, which should be proportionally larger than the front ones.
“A great drawing of a rabbit relies on capturing the essence of its anatomy – from the size of its feet to the shape of its ears” – Leonardo da Vinci
Here are some useful tips to help refine the rabbit’s body structure:
Remove unnecessary guidelines from your drawing to avoid distractions.
Ensure the rabbit’s front legs are shorter and leaner than the back legs.
Observe the natural curves and muscle structures in a rabbit’s body for a more realistic sketch.
To further enhance your rabbit drawing, consider incorporating the following techniques:
Sketching the rabbit’s paws with details, as this can significantly impact the overall appearance of your drawing.
Adding fur texture to the legs, as this can help illustrate the natural hardness of a rabbit’s skin.
Avoiding the use of straight lines when connecting shapes and, instead, opt for organic curves to emphasize natural fluidity and imply movement in your drawing.
Criteria
Excellent
Good
Average
Proportions
Back feet are visibly larger than front feet, capturing the essence of a rabbit’s anatomy.
Back feet are slightly larger than front feet, but more emphasis on the difference is needed.
Back and front feet sizes are similar, making it hard to differentiate between them.
Curves and shapes
Natural and fluid curves are used throughout the sketch, making it look more believable.
Some natural curves are present, but more could be added for a more organic appearance.
Straight lines dominate the drawing, causing the sketch to look stiff and unnatural.
Fur texture
Fur texture is present and skillfully applied, giving the drawing a realistic appearance.
Some fur texture is present, though more could be added to improve the overall look.
Little to no fur texture is visible, making the drawing less convincing.
With the right techniques, refining the rabbit body sketch and perfecting the proportions can help you create a truly beautiful and accurate rabbit drawing. Always remember to practice and learn from your successes and failures to continually improve your skills as an artist.
Capturing the Essence of a Rabbit’s Face
Focusing on detailing the rabbit’s face is crucial in creating an accurate and captivating drawing. By identifying and sketching the key elements such as the eyes, mouth, and ears, you can successfully capture a rabbit’s unique expression and likeness. In this section, we will explore the essential rabbit facial features and techniques to enhance your drawing.
Start by drawing the eyes, which are usually almond-shaped and convey a sense of alertness. Remember that a rabbit’s eyes are situated slightly higher on the head compared to other animals. Use straight and curved lines to illustrate the eyelids and bring life to the rabbit’s gaze. Next, add a small triangle for the nose, positioning it at the center of the face. For the mouth, draw two curved lines extending downward from the nose, resembling an upside-down ‘Y’. This will form the rabbit’s upper lip and the beginning of the lower jaw.
One of the most distinctive rabbit facial features is the ears, which you should pay special attention to in your drawing. Rabbit ears are long, with a slightly rounded tip and a narrower base. Keep in mind that the length and positioning of the ears may vary depending on the breed and the rabbit’s current mood or surroundings, with some rabbit ears measuring over 4 inches in length.
“Ears are an essential rabbit facial feature that adds character and uniqueness to your drawing.”
When capturing rabbit expression, pay attention to the subtle indications of their mood or emotion through other features such as the whiskers and fur. Whiskers are essential in giving your drawing a touch of liveliness, so add them with tapered strokes near the nose and mouth. Fur around the head can also contribute to the rabbit’s overall expression, as gentle curls and tufts can make your rabbit appear more happy or content.
Draw almond-shaped eyes with curved and straight lines
Add a small triangle for the nose
Draw two curved lines for the mouth
Illustrate long ears with a rounded tip and a narrow base
Add whiskers and fur around the face to enhance expression
By following the tips in this section and practicing, you will improve your ability to draw a rabbit’s face that captures its essence and portrays a sense of emotion. Keep experimenting with different expressions and techniques, and never forget to have fun with your drawing!
Techniques for Drawing Rabbit Fur Texture
Drawing realistic rabbit fur texture can be challenging, but with the right techniques and practice, you can master it. In this section, we will explore various shading techniques for rabbit drawing and how to create depth in your rabbit art.
Effective shading is crucial for creating the right rabbit fur texture and making your drawing come to life. Follow these steps to create a realistic rabbit fur texture:
Begin with a light layer of powdered graphite on the fur areas using a soft brush. This creates an even base and helps to establish the overall tonality for your drawing.
Using a 4B or a mechanical pencil, draw fur strokes in the direction of the fur growth, varying the direction and length of the strokes to mimic the natural flow of the rabbit’s fur.
Apply pressure variation in different areas of your drawing. Press harder on the pencil where the fur appears darker and lighter where the fur is lighter or catching the light.
Blend fur strokes using a blending tool such as a blending stump or a clean brush. This will smooth out any hard edges and create a more natural look.
Remember, fur is not uniform. There will be a mix of messiness and order, with both long and short hairs contributing to the rich texture of the rabbit’s coat. Some parts of the rabbit’s body, such as its back and forehead, will have a more uniform appearance, while areas around the ears and tail will have a looser, messier texture.
To create a true-to-life rabbit fur texture, practice various shading techniques, pay attention to the different lengths and directions of the fur strokes, and maintain a balance of messiness and uniformity.
Creating Depth in Rabbit Art
Creating depth in your rabbit drawing is essential for achieving a realistic feel and making your rabbit appear three-dimensional. To create depth in rabbit art, follow these tips:
Layer shading: Build up layers of shading to create a sense of depth in your drawing. Start with a base layer of powdered graphite, then add additional layers of fur strokes using pencil, increasing the pressure where necessary.
Contrast: Recognize that areas of shadow and light contribute to an illusion of depth. Pay attention to the natural contrasts that occur as light falls on the rabbit’s body and use them to guide your shading process.
Detail: Additional details, such as whiskers and tufts around the face, can further enhance the sense of depth in your rabbit art.
By incorporating these shading techniques and focusing on creating depth, your rabbit drawing will come to life and showcase a realistic, textured, and captivating fur appearance.
Adding Character to Your Rabbit Drawing
Personalizing your rabbit drawing plays a significant role in bringing your artwork to life. By adding distinctive details such as whiskers, fluff around the face, and a tail, you can give your sketch a unique character that sets it apart from others. In this section, we will explore various ideas and inspirations for adding character to your rabbit drawing, for an adorable and expressive piece of art.
Whiskers: Include slightly curved, thin lines to represent the rabbit’s whiskers, providing a sense of depth as well as bringing a playful essence to your drawing.
Fluff around the face: To accentuate the rabbit’s soft, fluffy nature, add some fur details around its face, using short, soft strokes, imitating the texture and appearance of fur.
Tail: A charming, puffy tail adds a cute factor to your rabbit drawing. Draw a small oval and fill it with layers of curved lines to represent the fluffy texture of the tail.
Unique markings: Should your rabbit have any distinctive markings or patterns on its fur, incorporate those into the drawing to make it instantly recognizable and true-to-life.
Facial expressions: Experiment with different facial expressions, such as a happy smile or a curious look, to convey the rabbit’s mood and emotions.
Posture and movement: Depicting the rabbit in various actions or positions, such as hopping, sitting upright, or lounging, brings dynamism and versatility to the artwork.
Props and accessories: To make your rabbit drawing even more interesting, consider adding fun items like a bow tie, hat, or nibbling on a carrot.
While taking inspiration from rabbit art lessons, don’t forget to pay close attention to the nuances that make your rabbit look alive and express its unique personality. By intelligently incorporating these distinctive elements, you can create a captivating, character-filled rabbit drawing that is as endearing as the real-life creature itself.
Final Touches: Reviewing and Refining Your Rabbit Art
Now that you have carefully sketched the basic structure, specific features, and fur texture of your rabbit drawing, the next crucial step is to enhance and refine the overall appearance. This involves erasing guidelines, perfecting the details, and ensuring a clean and polished look to your rabbit art.
“The finishing touches to any art piece can truly set it apart and make it stand out.”
Begin by erasing the light sketch lines and guidelines you initially created to form the rabbit’s basic shape. Be thorough and meticulous in this process to ensure every unwanted mark is removed without damaging the main lines of your drawing.
Once you have removed all guidelines, shift your focus to enhancing the details of key areas in your rabbit drawing. Since the eyes, whiskers, and fur contribute significantly to the overall appeal, it’s essential to refine and perfect them using precision tools and techniques. Below are some expert tips for refining these crucial elements:
Eyes: Add depth and dimension by darkening the iris and pupils. Revisit the highlights and make any necessary adjustments to capture a more natural appearance.
Whiskers: Review the whiskers to ensure they are evenly spaced and appear natural. Adjust lines to create delicate yet distinct whiskers and correct any irregularities.
Fur Texture: Enhance the fur by further refining shading and highlights, creating a more realistic appearance over the entire rabbit’s body.
As you finalize the final touches in rabbit drawing, remember that patience and attention to detail are crucial during the rabbit sketch refinement stage. By investing time and effort in enhancing and polishing your rabbit drawing, you are not only honing your skills but also creating a captivating piece of art to be proud of. As a result, your rabbit drawing will exhibit well-defined features and texture that will undoubtedly impress viewers.
Conclusion
As we reach the end of this comprehensive tutorial, we hope it has provided you with the insight and tools necessary to create a realistic bunny pencil sketch. Mastering rabbit drawing techniques may seem challenging at first, but with practice and persistence, artists of all levels can achieve impressive results.
As you continue on your rabbit art journey, always remember to refer back to the tips and tricks shared in this guide, such as understanding rabbit anatomy, effectively rendering fur textures, and capturing the unique essence of a rabbit face. These foundational skills can be expanded upon over time as your skills and confidence grow.
In conclusion, we hope that this concluding rabbit art tutorial has not only been informative but also inspiring for anyone looking to delve into the world of rabbit drawing. Keep practicing and refining your approach, and soon you will be able to create stunning, lifelike rabbit sketches that will captivate your audience.
FAQ
What tools and materials are needed for a beginner’s rabbit sketch?
To start sketching a rabbit, you’ll need a paper, a selection of pencils including a 4B and a mechanical pencil, graphite powder for shading, a soft brush, an eraser, preferably a kneaded one, and a compass or circle tool for aiding in structure.
How can I ensure proper lighting and comfort while drawing a rabbit?
Your drawing space should be comfortable, with adequate lighting to properly see your work. Ensuring these conditions can have a significant impact on the accuracy and quality of your rabbit drawing.
What are the key physical features to focus on when drawing a rabbit’s anatomy?
Key features to emphasize while drawing include the rabbit’s ears, which can measure over 4 inches, the differing lengths of hind and front legs, and the unique fur-covered feet that assist with grip. Understanding these elements is essential for creating a true-to-life rabbit sketch.
How do I capture the essence of a rabbit’s face in my drawing?
Focus on detailing the rabbit’s face by identifying and sketching the key elements such as the eyes, mouth, and ears. Use straight and curved lines to denote the structure and add a small triangle for the nose to enhance realism.
What techniques can be used for drawing rabbit fur texture?
To simulate the rabbit’s fur texture, use a combination of messy and uniform fur techniques with long and short strokes for different parts of the rabbit’s body. Apply powdered graphite with a brush for an even base before refining the fur texture with pencils and blending tools for depth and realism.
How can I add character to my rabbit drawing?
Personalize your rabbit drawing by adding distinctive details such as whiskers, fluff around the face, and tail to give character to your sketch. Pay attention to the nuances that make your rabbit look alive and express its unique personality.
What are the final steps in refining a rabbit drawing?
After completing the initial sketch, meticulously erase the guidelines. Enhance details like the eyes, whiskers, and fur using precision tools. This step ensures that your rabbit drawing appears clean and polished, with well-defined features and texture.